
Editing photos on your phone has never been easier! With the help of the free Adobe Lightroom app and some Lightroom presets you can easily achieve a professional look on your photos with just one click. In this article, I will share a step-by-step on how to install Lightroom presets on your mobile.
*Disclosure: This post contains a few affiliate links, which means I may receive a small commission, at no cost to you, if you make a purchase through my link.*
No time to read now? Pin it for later!
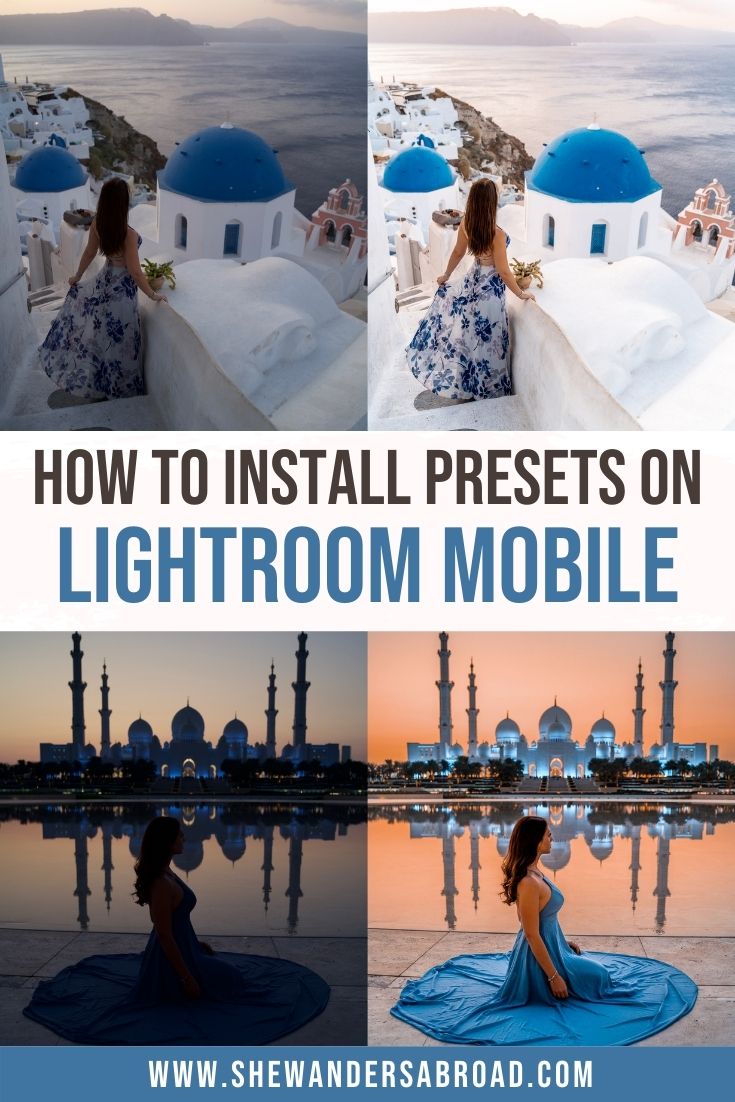

Table of Contents
What is a Lightroom Preset?
First things first: what is a Lightroom preset exactly? Presets are basically photo filters that you can apply in Adobe Lightroom to easily edit your photos with just one click. Each preset has a unique configuration of settings that are designed to achieve a specific look on your photos.
With the help of presets you can achieve a consistent look on your photos (just think about all those perfectly curated Instagram feeds) and they can also save you a lot of time as instead of doing all the settings manually on each photo, you can just use a custom made preset that already contains all the settings.
Of course, the settings of the presets are not set in stone, after applying them to your photos you can still make manual adjustments, such as increasing the exposure on darker photos, making the colors more vivid by increasing the vibrance, etc.
So if a preset doesn’t exactly look the way you want, don’t be afraid to play around with the different settings!
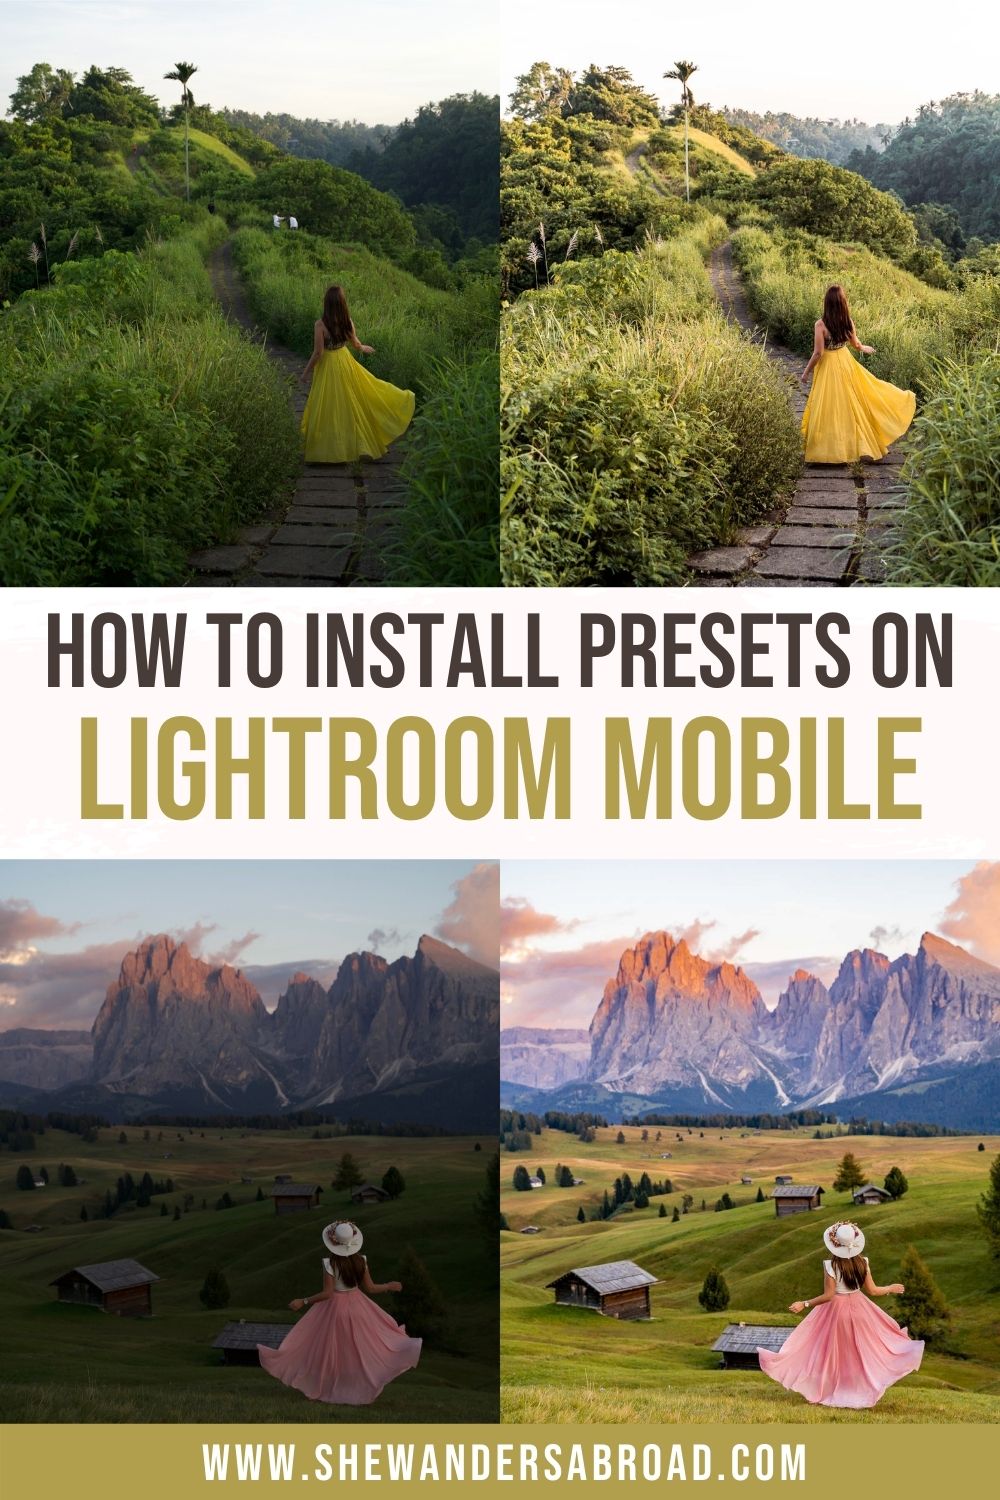
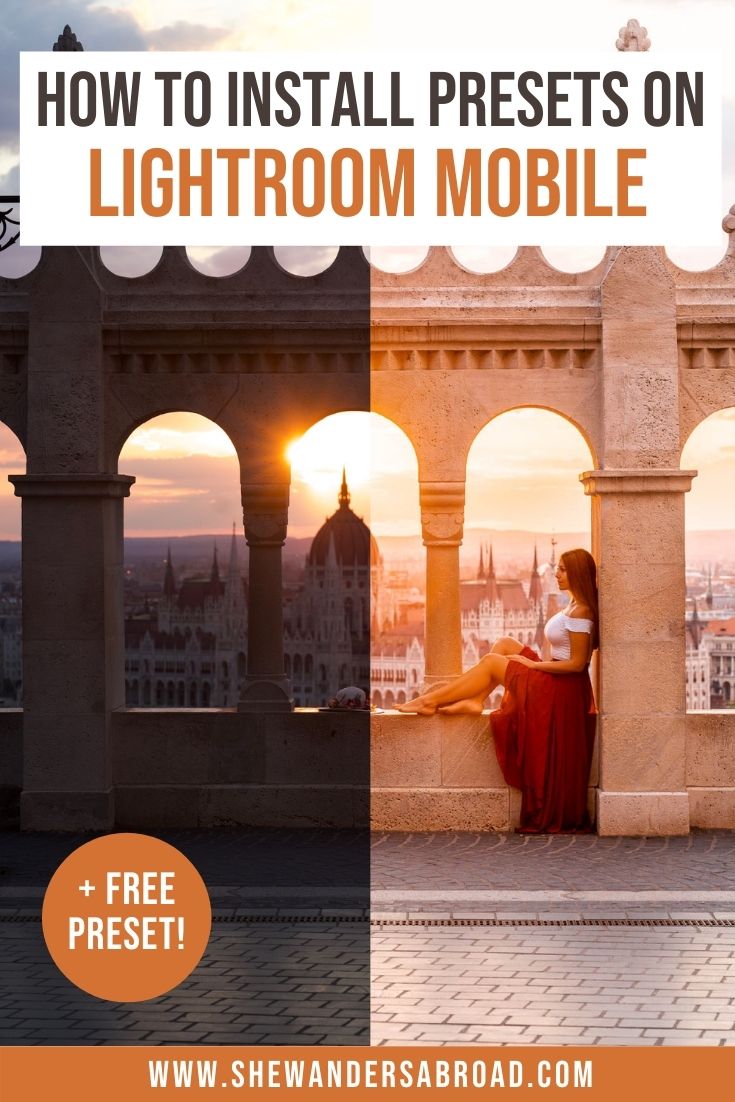
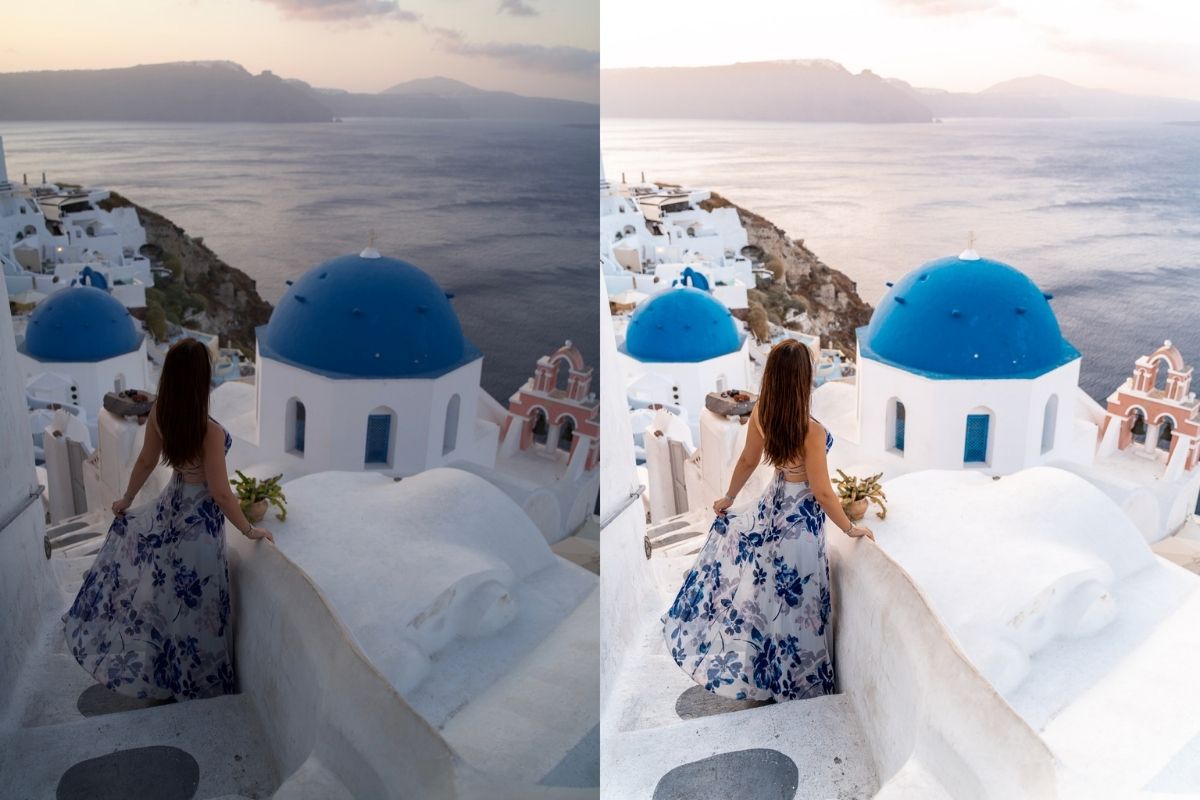
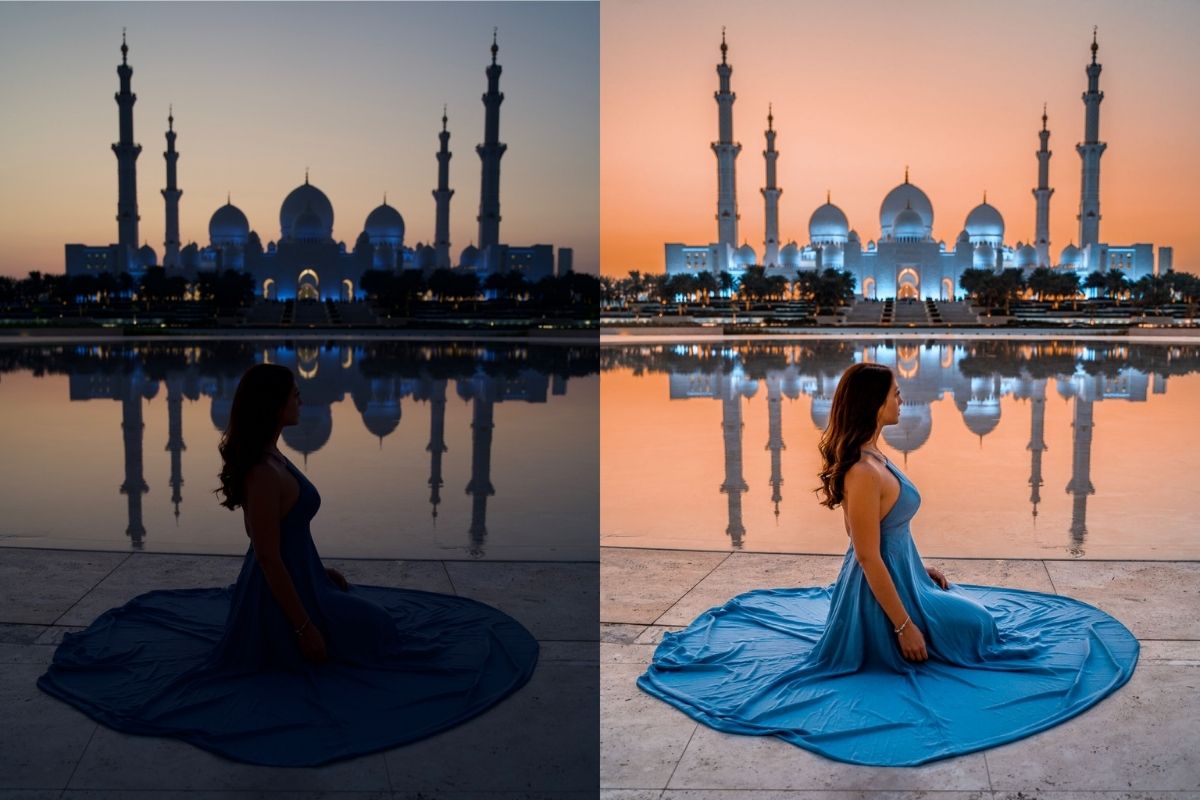
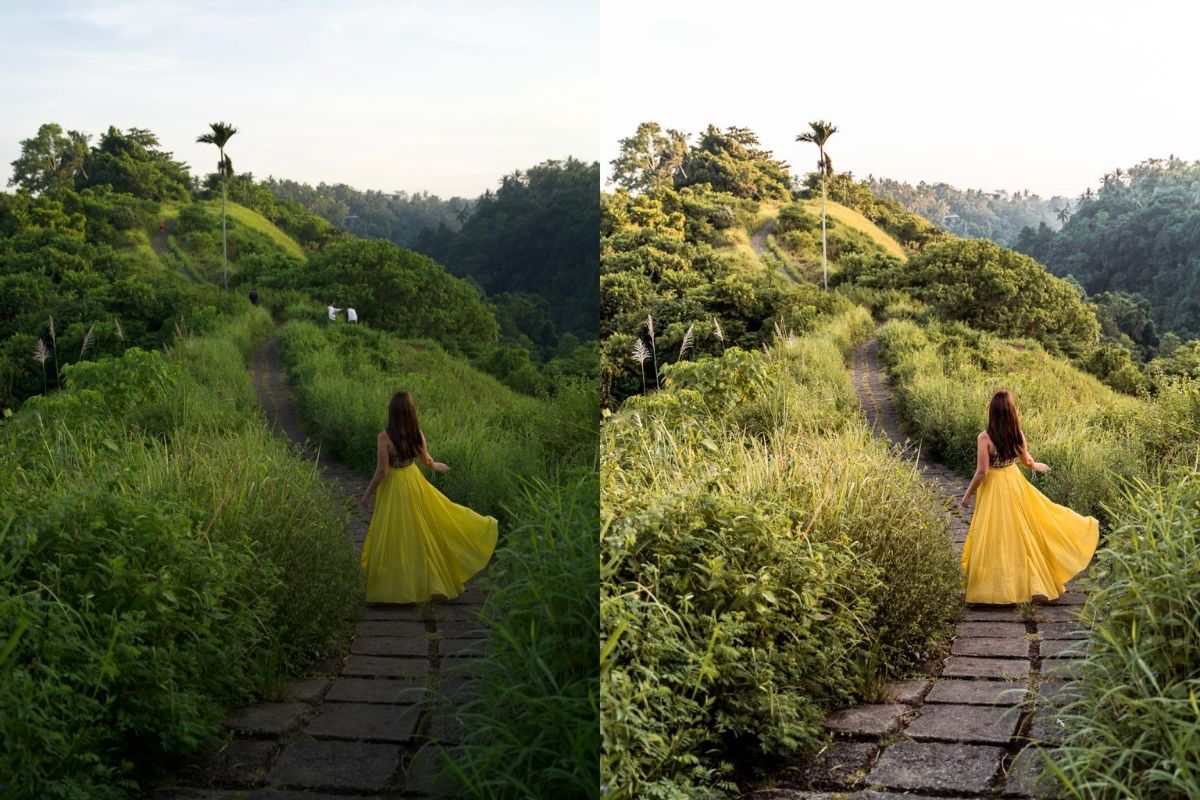
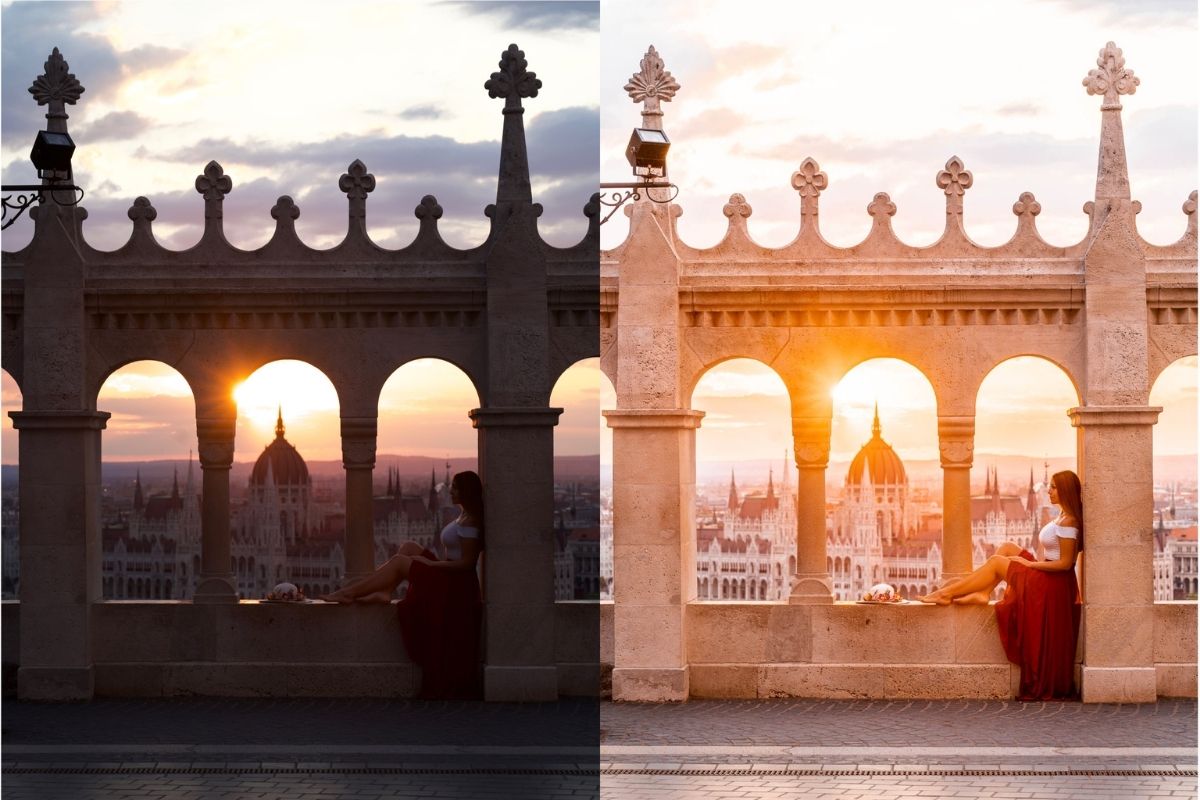
Below you can see a few before-afters from my photos, all of them were edited in Adobe Lightroom using my own presets and making some manual adjustments afterward.
What do You Need for Installing Lightroom Presets on Mobile?
As you will see in the next chapter, installing Lightroom presets on your mobile is a super easy and straightforward task. You will only need a few things for installing your presets, I will list all of them below.
YOUR MOBILE
It’s pretty self-explanatory, but you’re going to need your mobile phone to use the mobile presets. It doesn’t really matter what kind of phone you have (as long as it’s a smartphone), the presets will work both on iOS and Android.
ADOBE LIGHTROOM PHOTO EDITOR APP
In order to be able to work with the preset, you will need to install the free Adobe Lightroom Photo Editor app on your mobile. It’s available for both iOS and Android, you can download the iOS version here.
Although the app itself is free, there are some premium features such as editing raw files and making selective adjustments that are only available if you have a paid subscription. The good news is that you will not need a subscription for using presets!
If you’re only starting out with photo editing, having the free version of Adobe Lightroom is more than enough, it’s a pretty powerful app already. But if you want to take your editing to the next level I absolutely recommend subscribing to the paid version.
Not only does it include the premium features of Lightroom mobile, but you can also use Lightroom Classic on desktop and depending on your subscription type, Adobe Photoshop CC as well.
You can check the different subscription plans here, I’m personally using the Creative Cloud Photography Plan that includes Lightroom, Photoshop, and 20GB of Cloud storage.
THE PRESET FILE
Whenever you purchase a mobile preset or receive it as a freebie, you will receive a zipped file that contains one or more DNG files (this is the preset itself). Desktop presets have a different extension (usually XMP) so if the file you received is not in a DNG format, it will not work on your mobile. In this case, contact the person from whom you purchased/received the mobile preset!
YOUR LAPTOP (OPTIONAL)
Having a laptop is not really necessary for installing Lightroom presets on your mobile, but since the presets usually come as a zipped file, it’s a bit easier to unzip the files on your laptop and send them to your phone. Don’t worry, it can be done solely on your mobile as well, in the next chapter I will show you how!
How to Install Lightroom Presets on Mobile?
Step 1: Download or transfer the DNG file to your phone
As I mentioned before, presets usually come as a zipped file so after downloading the file you will need to unzip it in order to access the DNG files.
The easiest option is to use your laptop, unzip the file there and send the DNG files to your mobile. You can use Airdrop, Dropbox, Google Drive, email, whatever you like. This way the files will be saved to your gallery (don’t worry if all you can see is a blank photo, it should be like this!) and you are all set to do the next step.
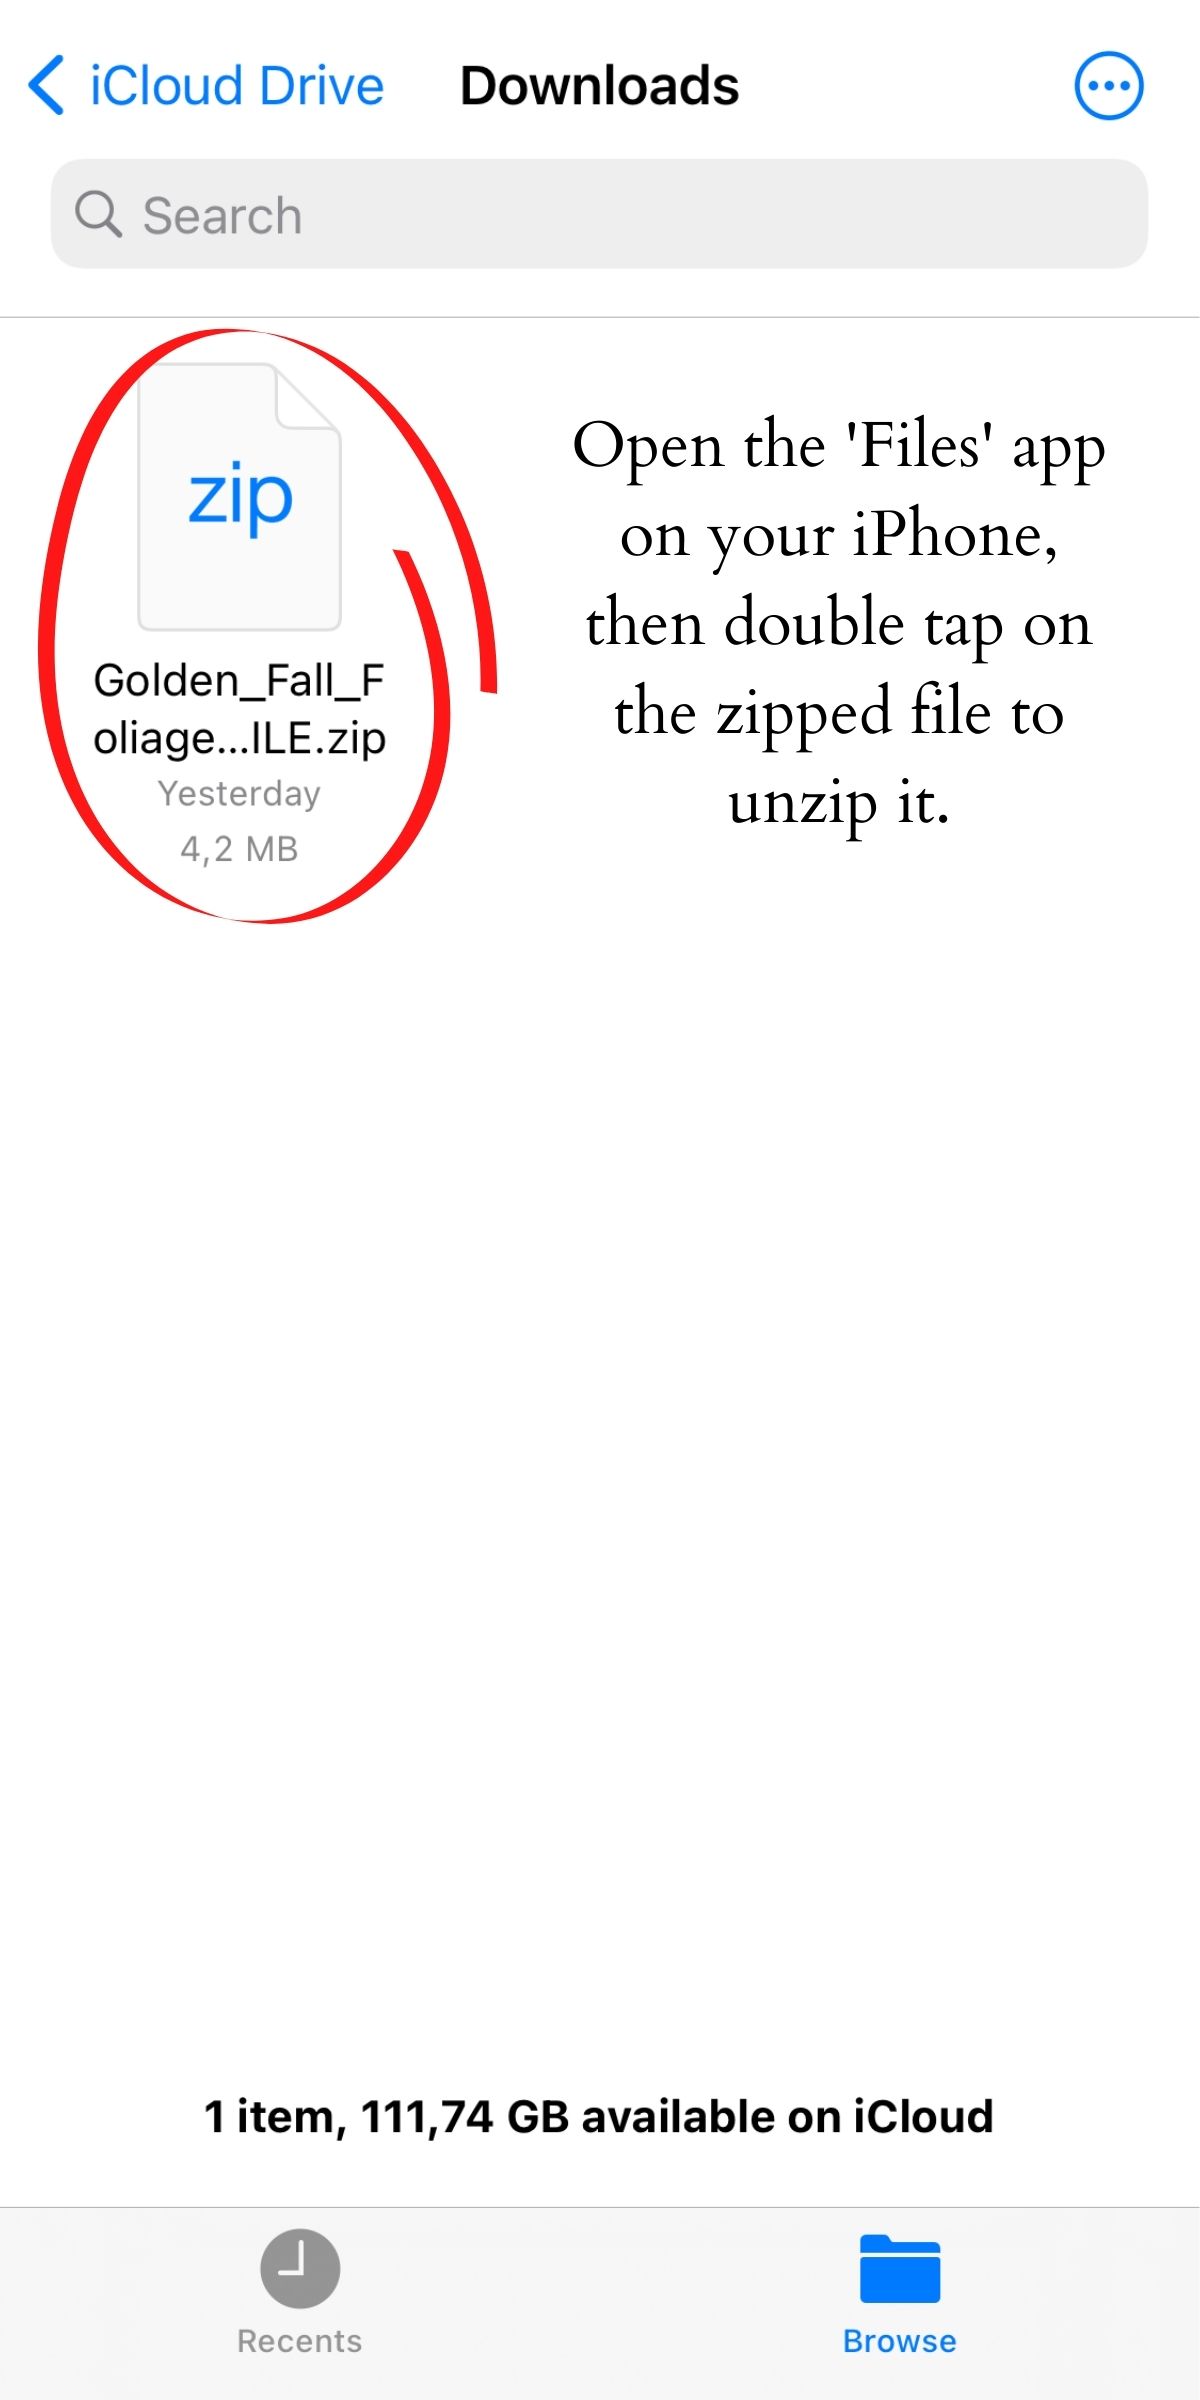
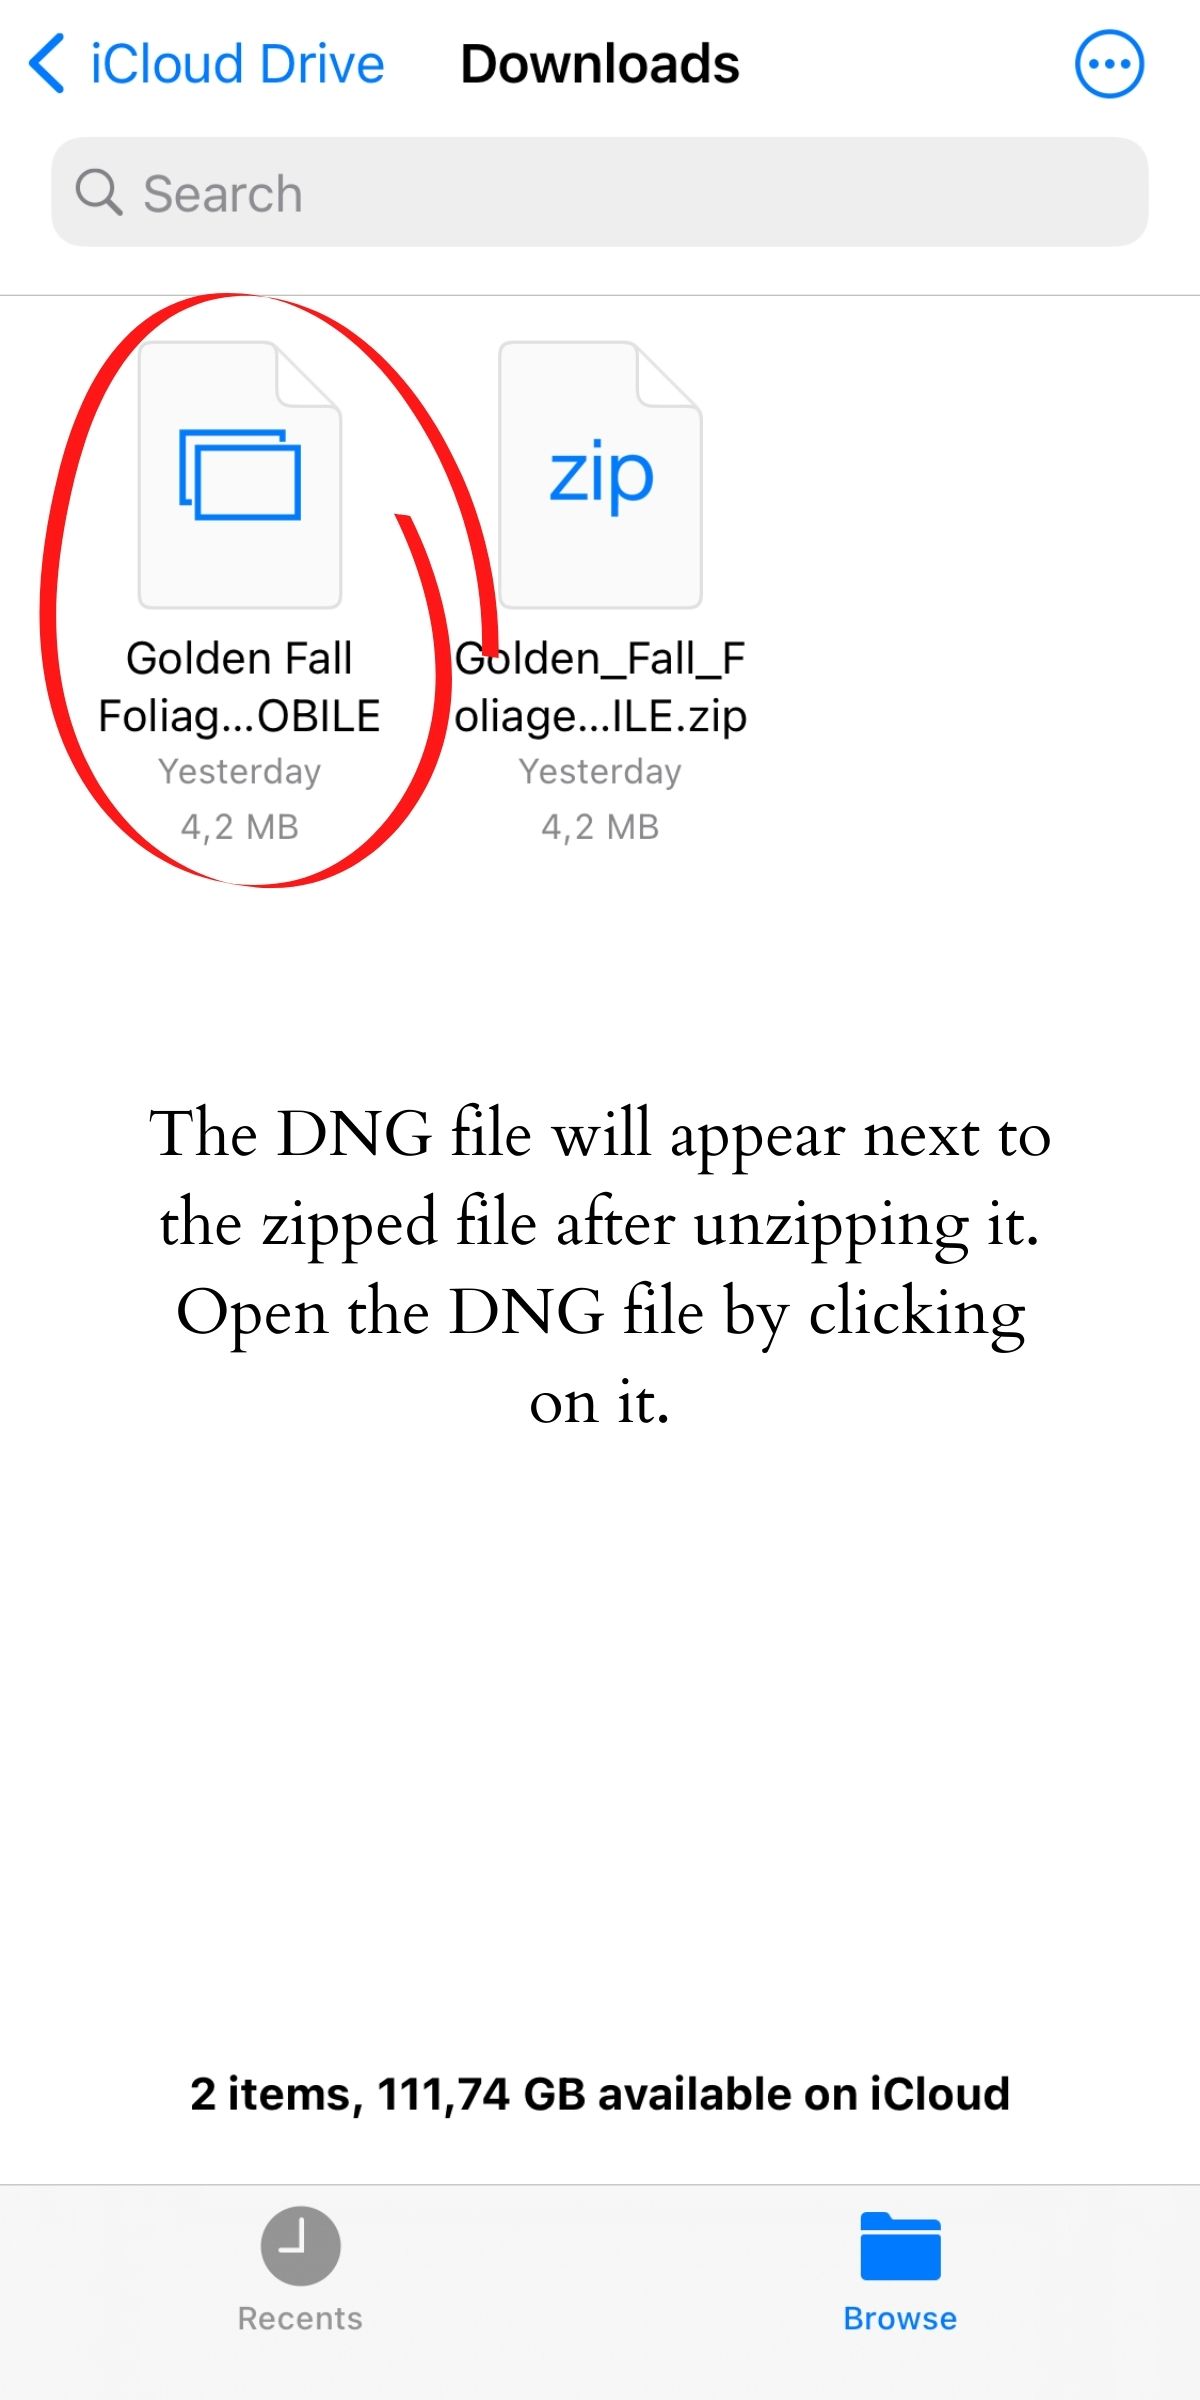
If you don’t have a laptop or you don’t want to use it for whatever reason, you can also unzip the files directly on your mobile. After downloading the zipped file to your iPhone, go to Files and tap on the zipped file to unzip it. If you do this correctly, the DNG file will automatically appear next to the zipped file.
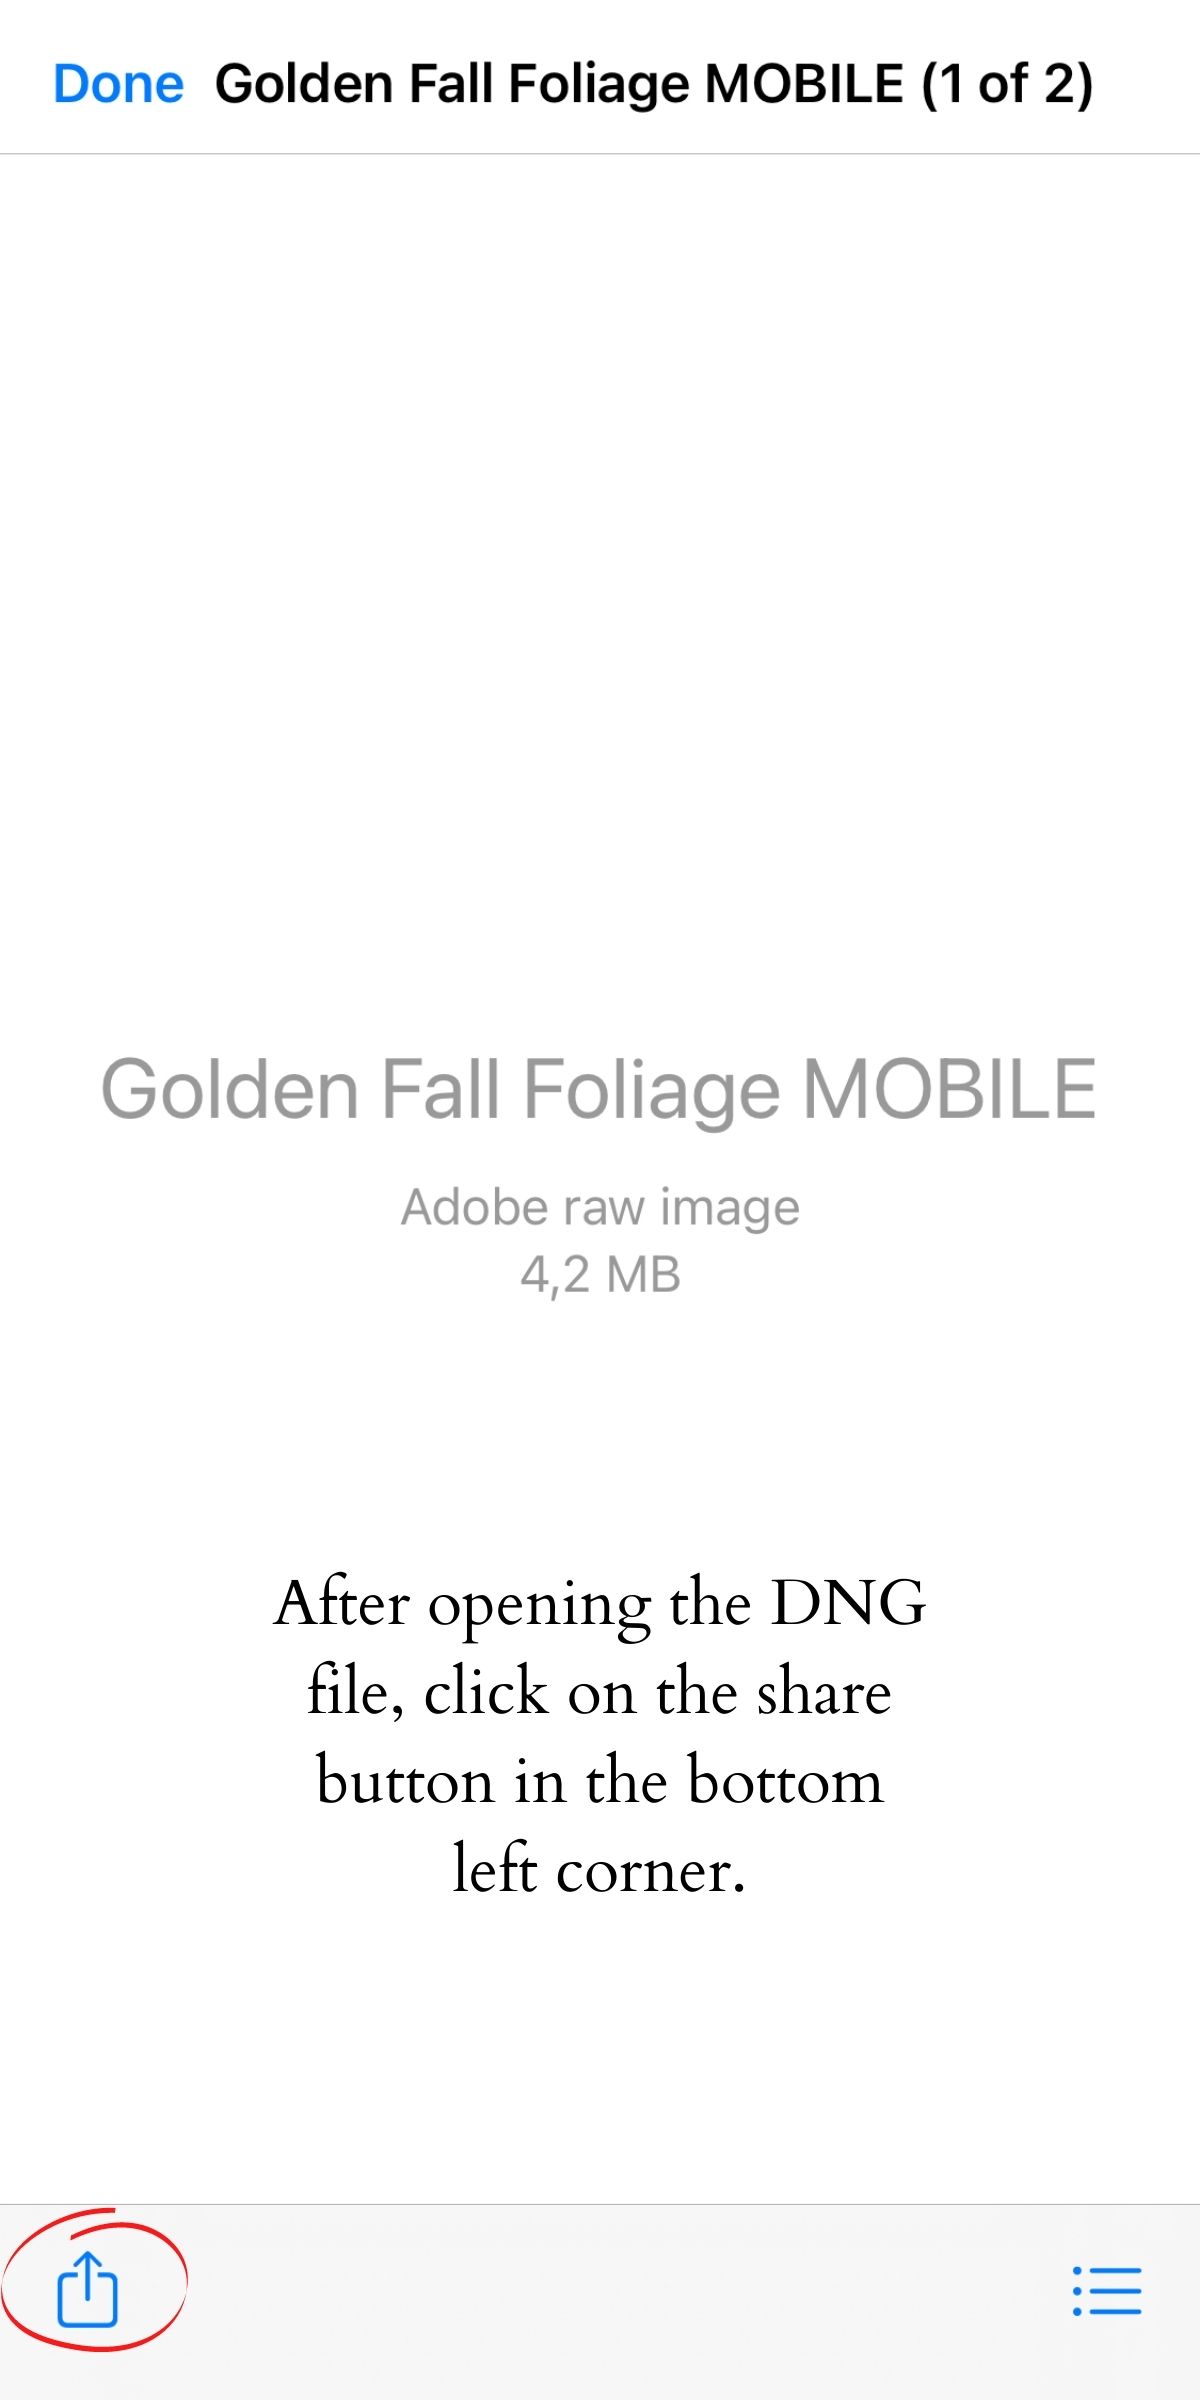
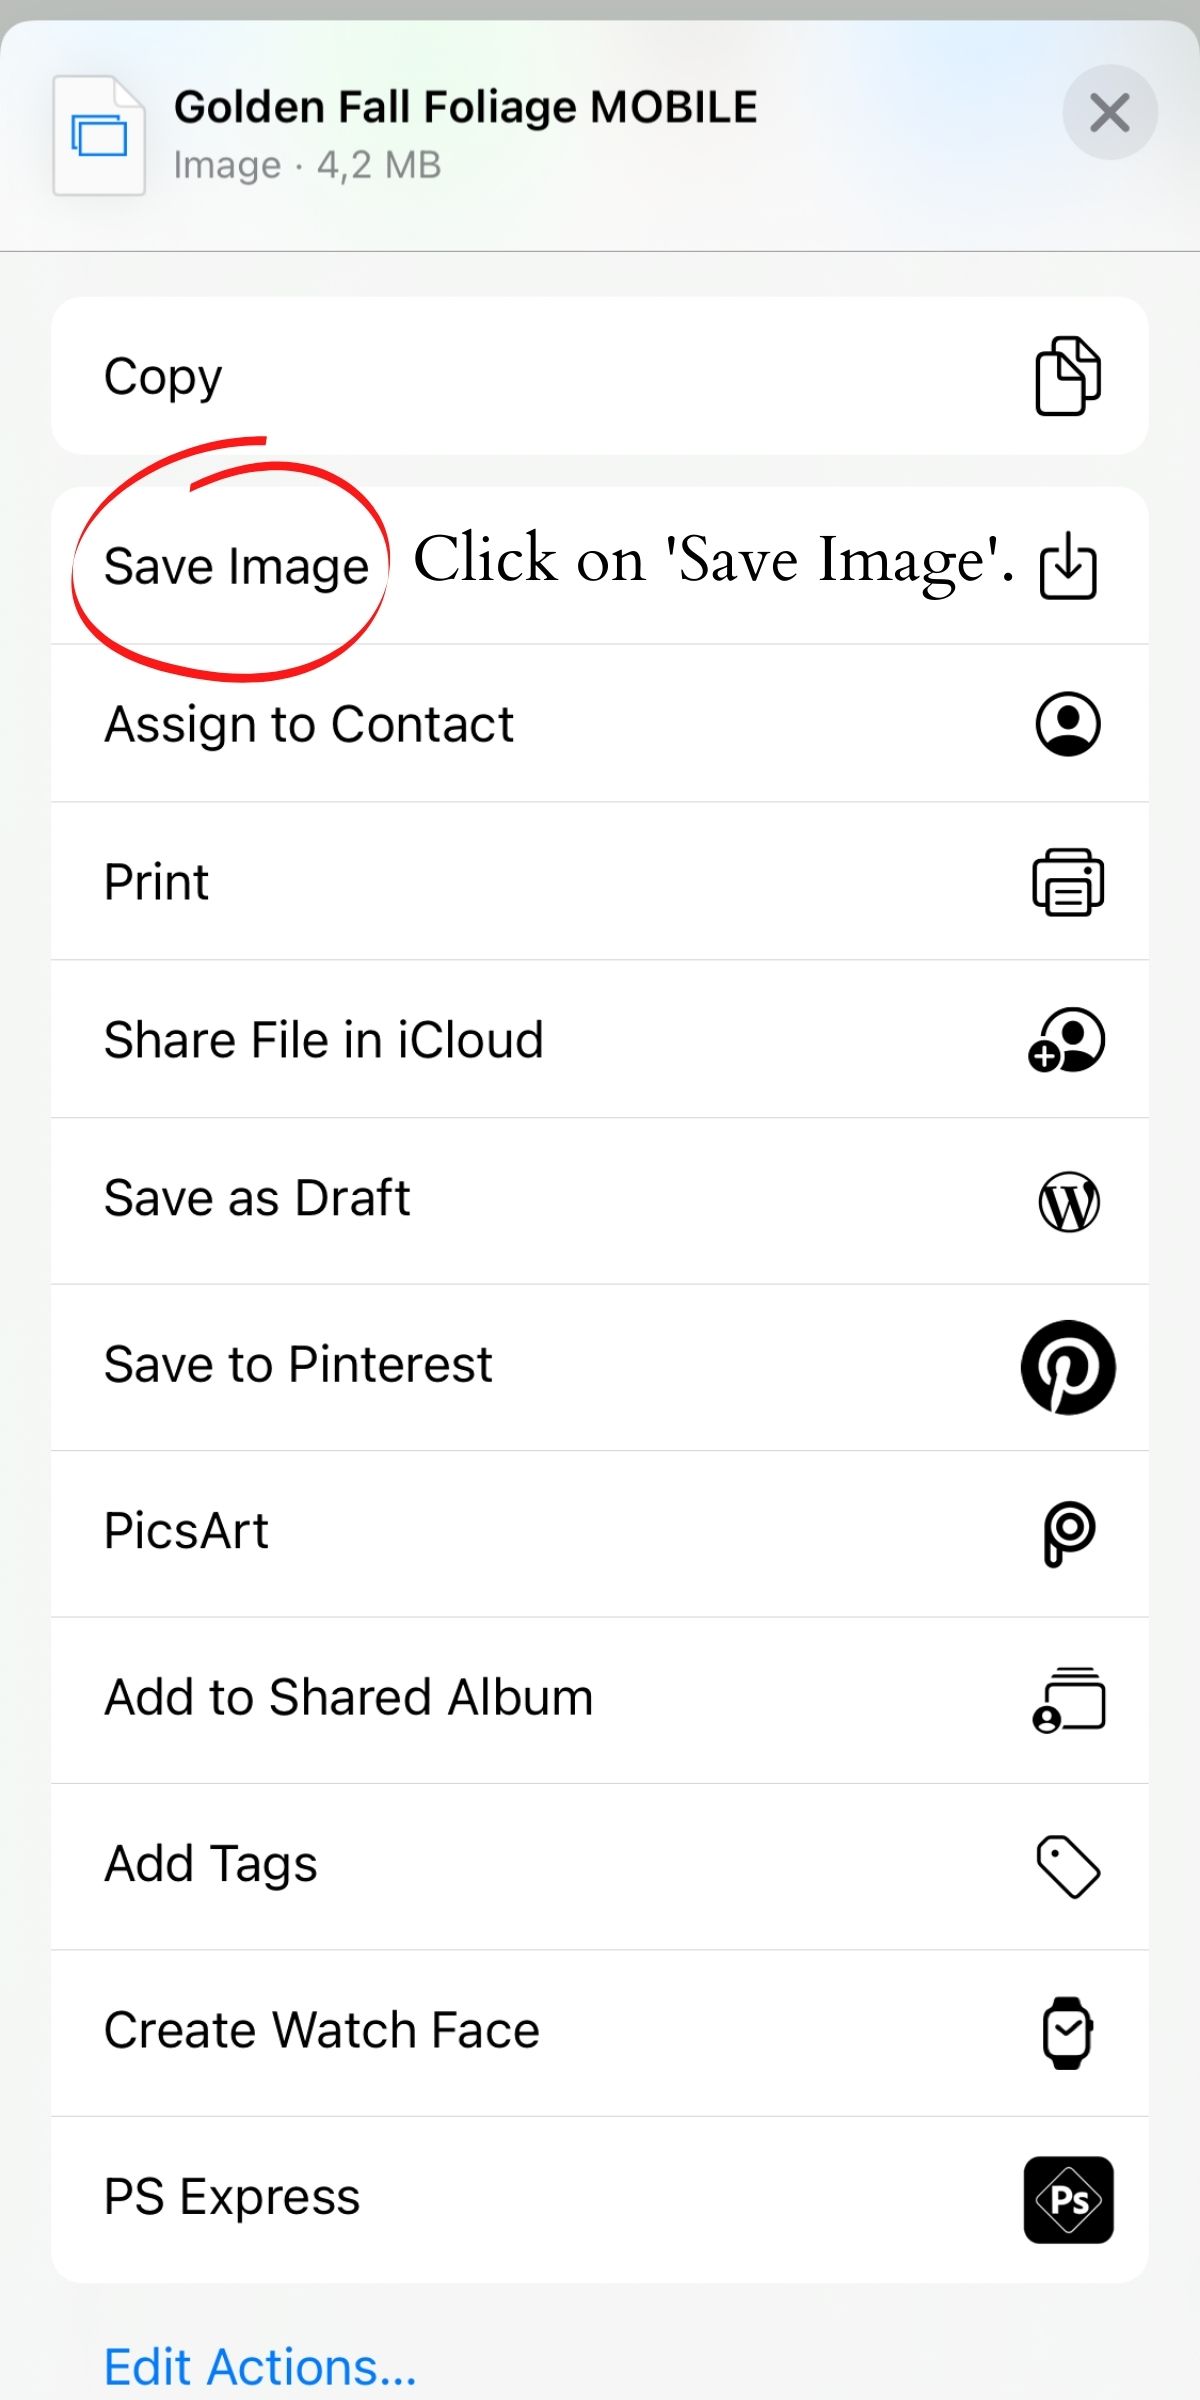
Open the DNG file, click on the share icon in the bottom left corner and click on ‘Save Image’. This way the DNG file will be saved in your gallery. As I mentioned before, all you will see is a blank photo but don’t worry, this is all that you need for now!
Step 2: Import the DNG file to the Lighroom Mobile app
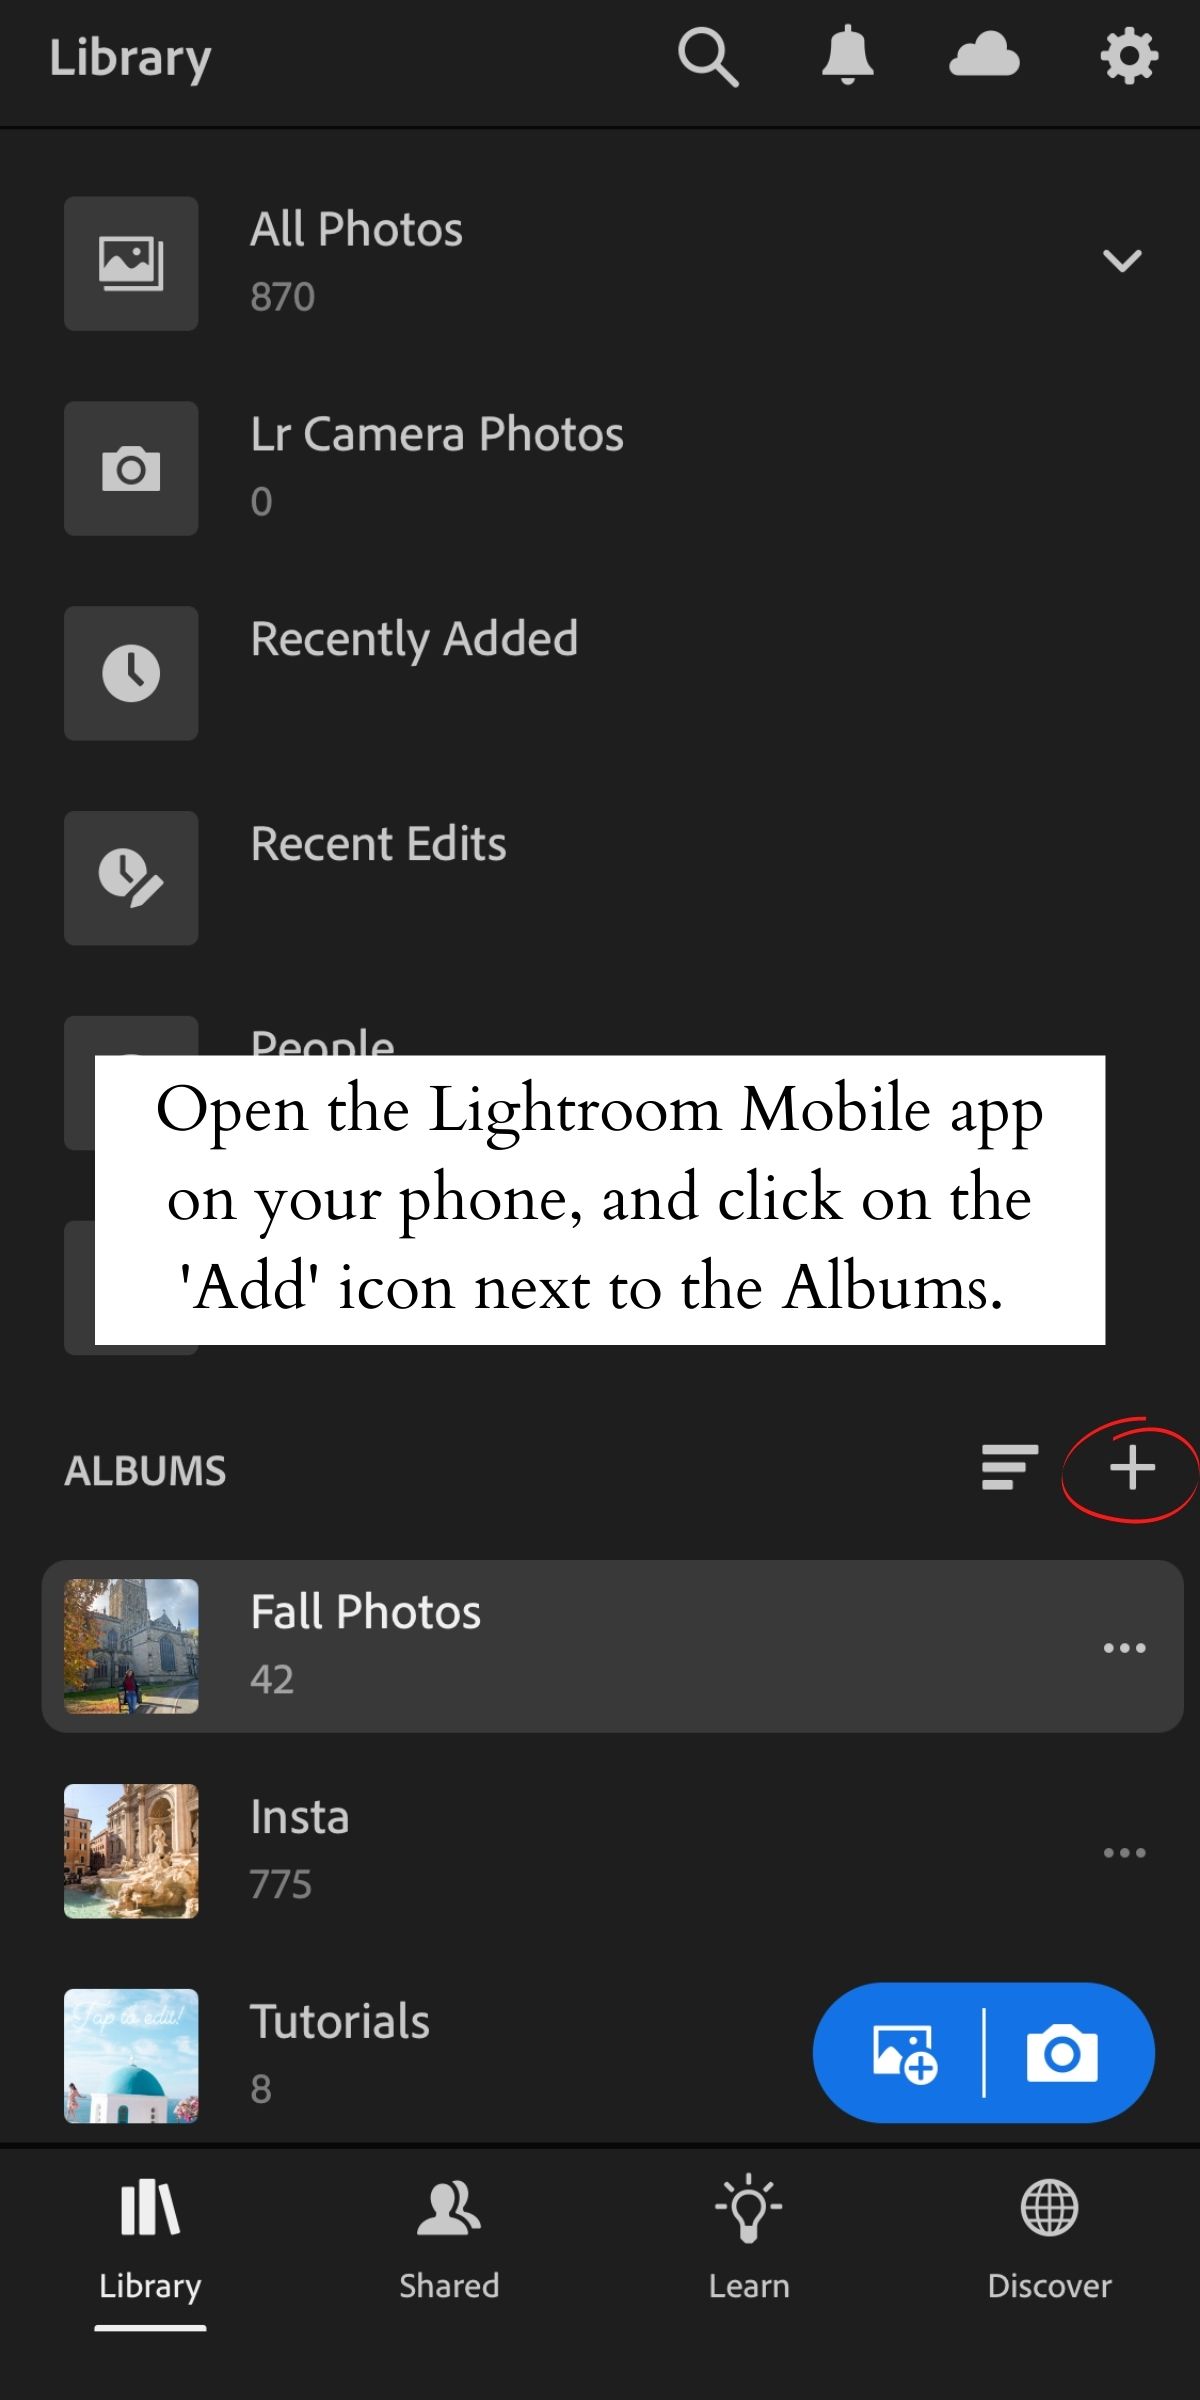
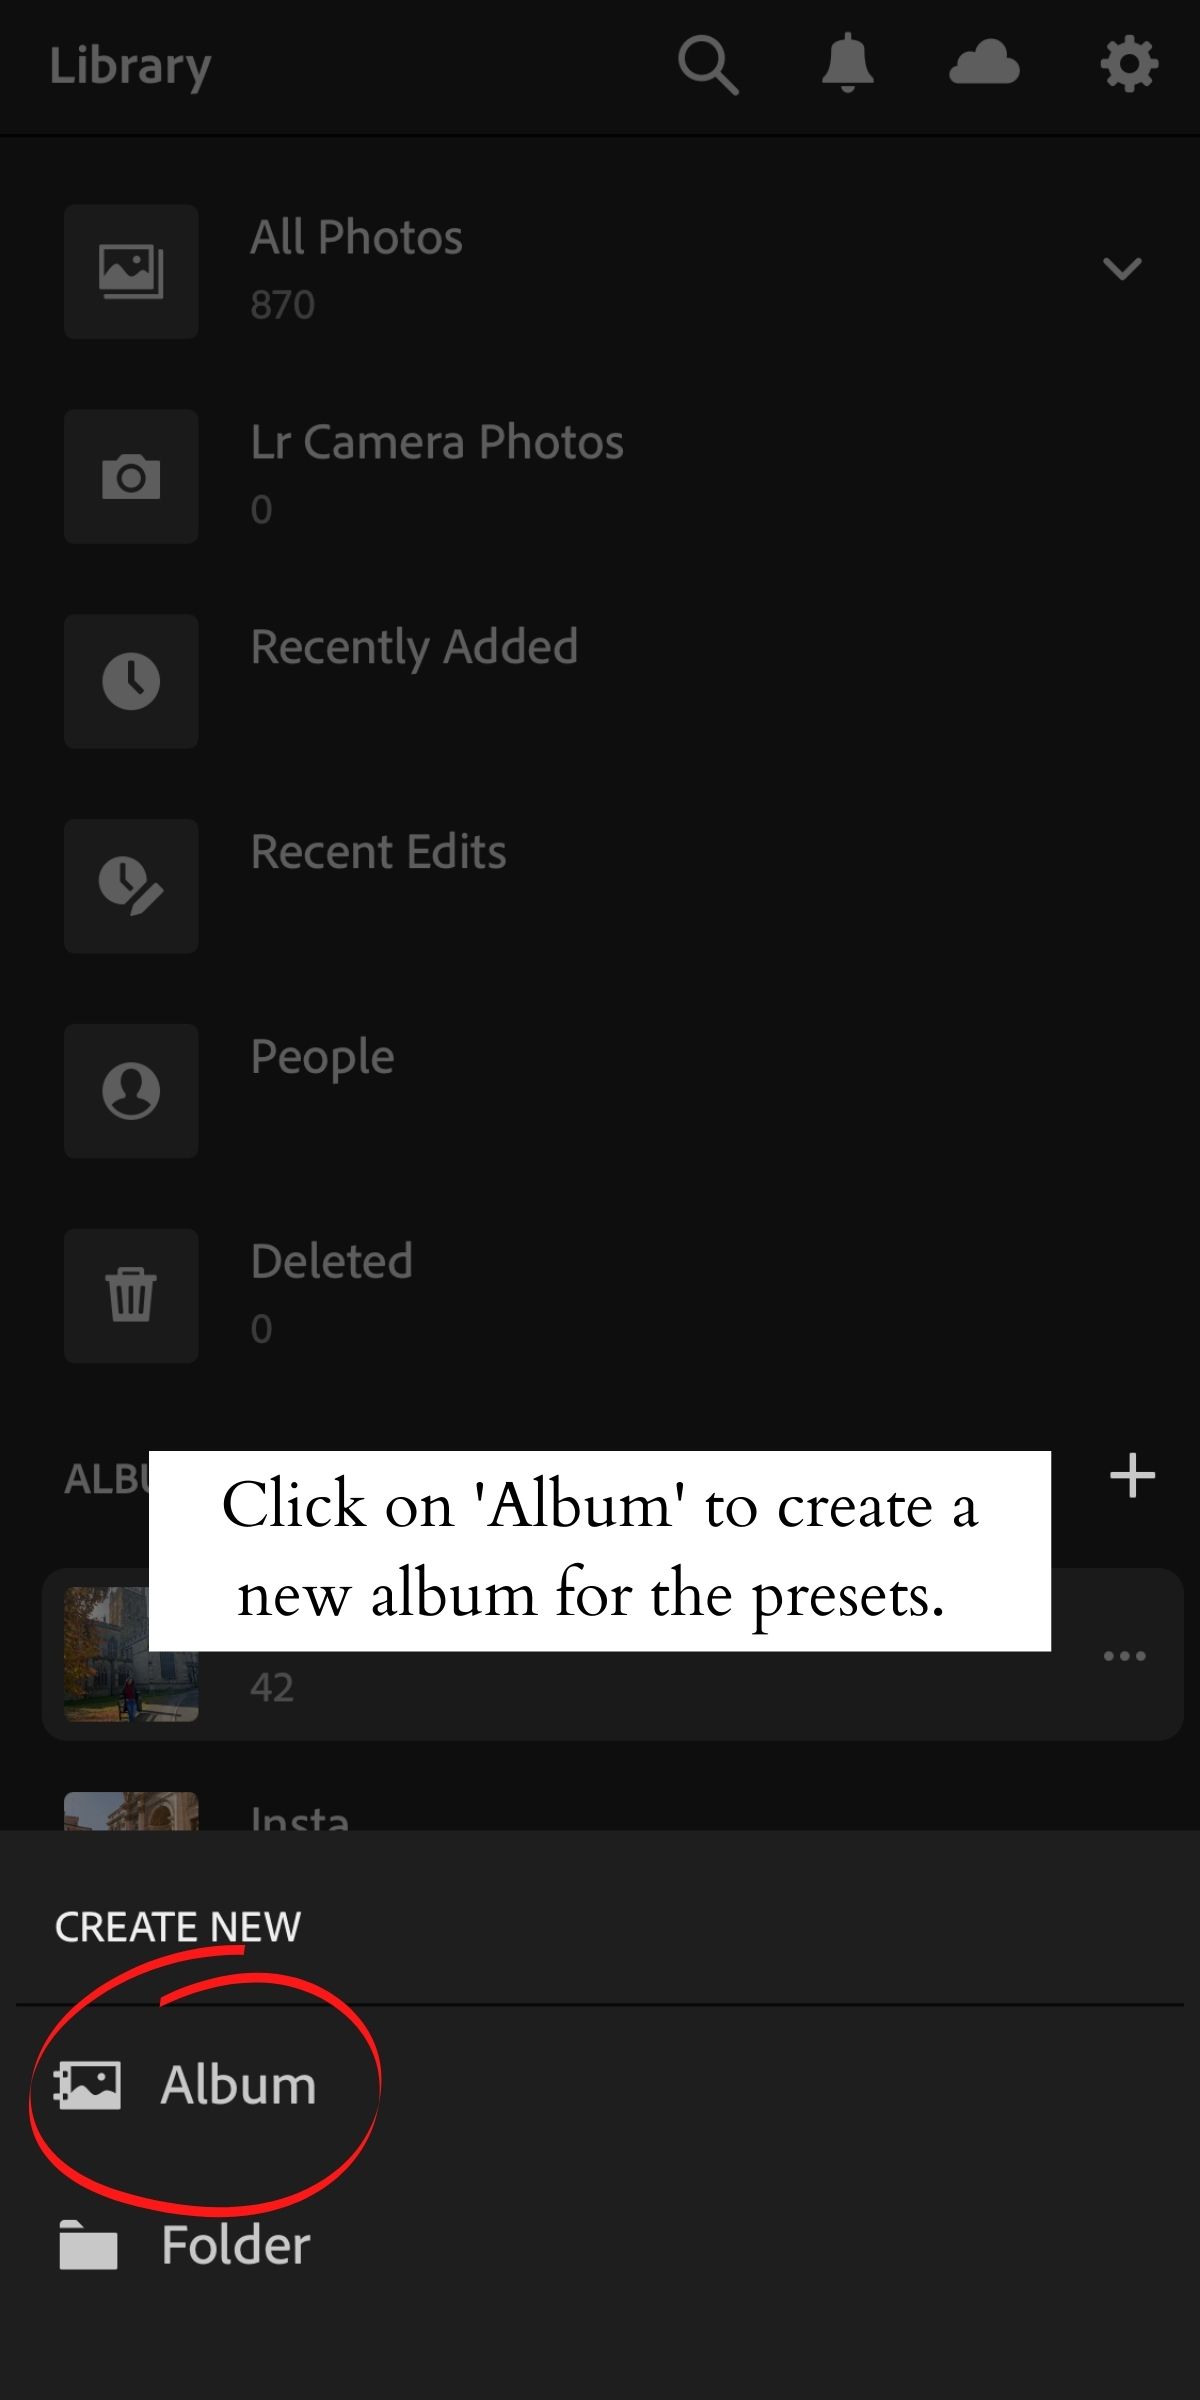
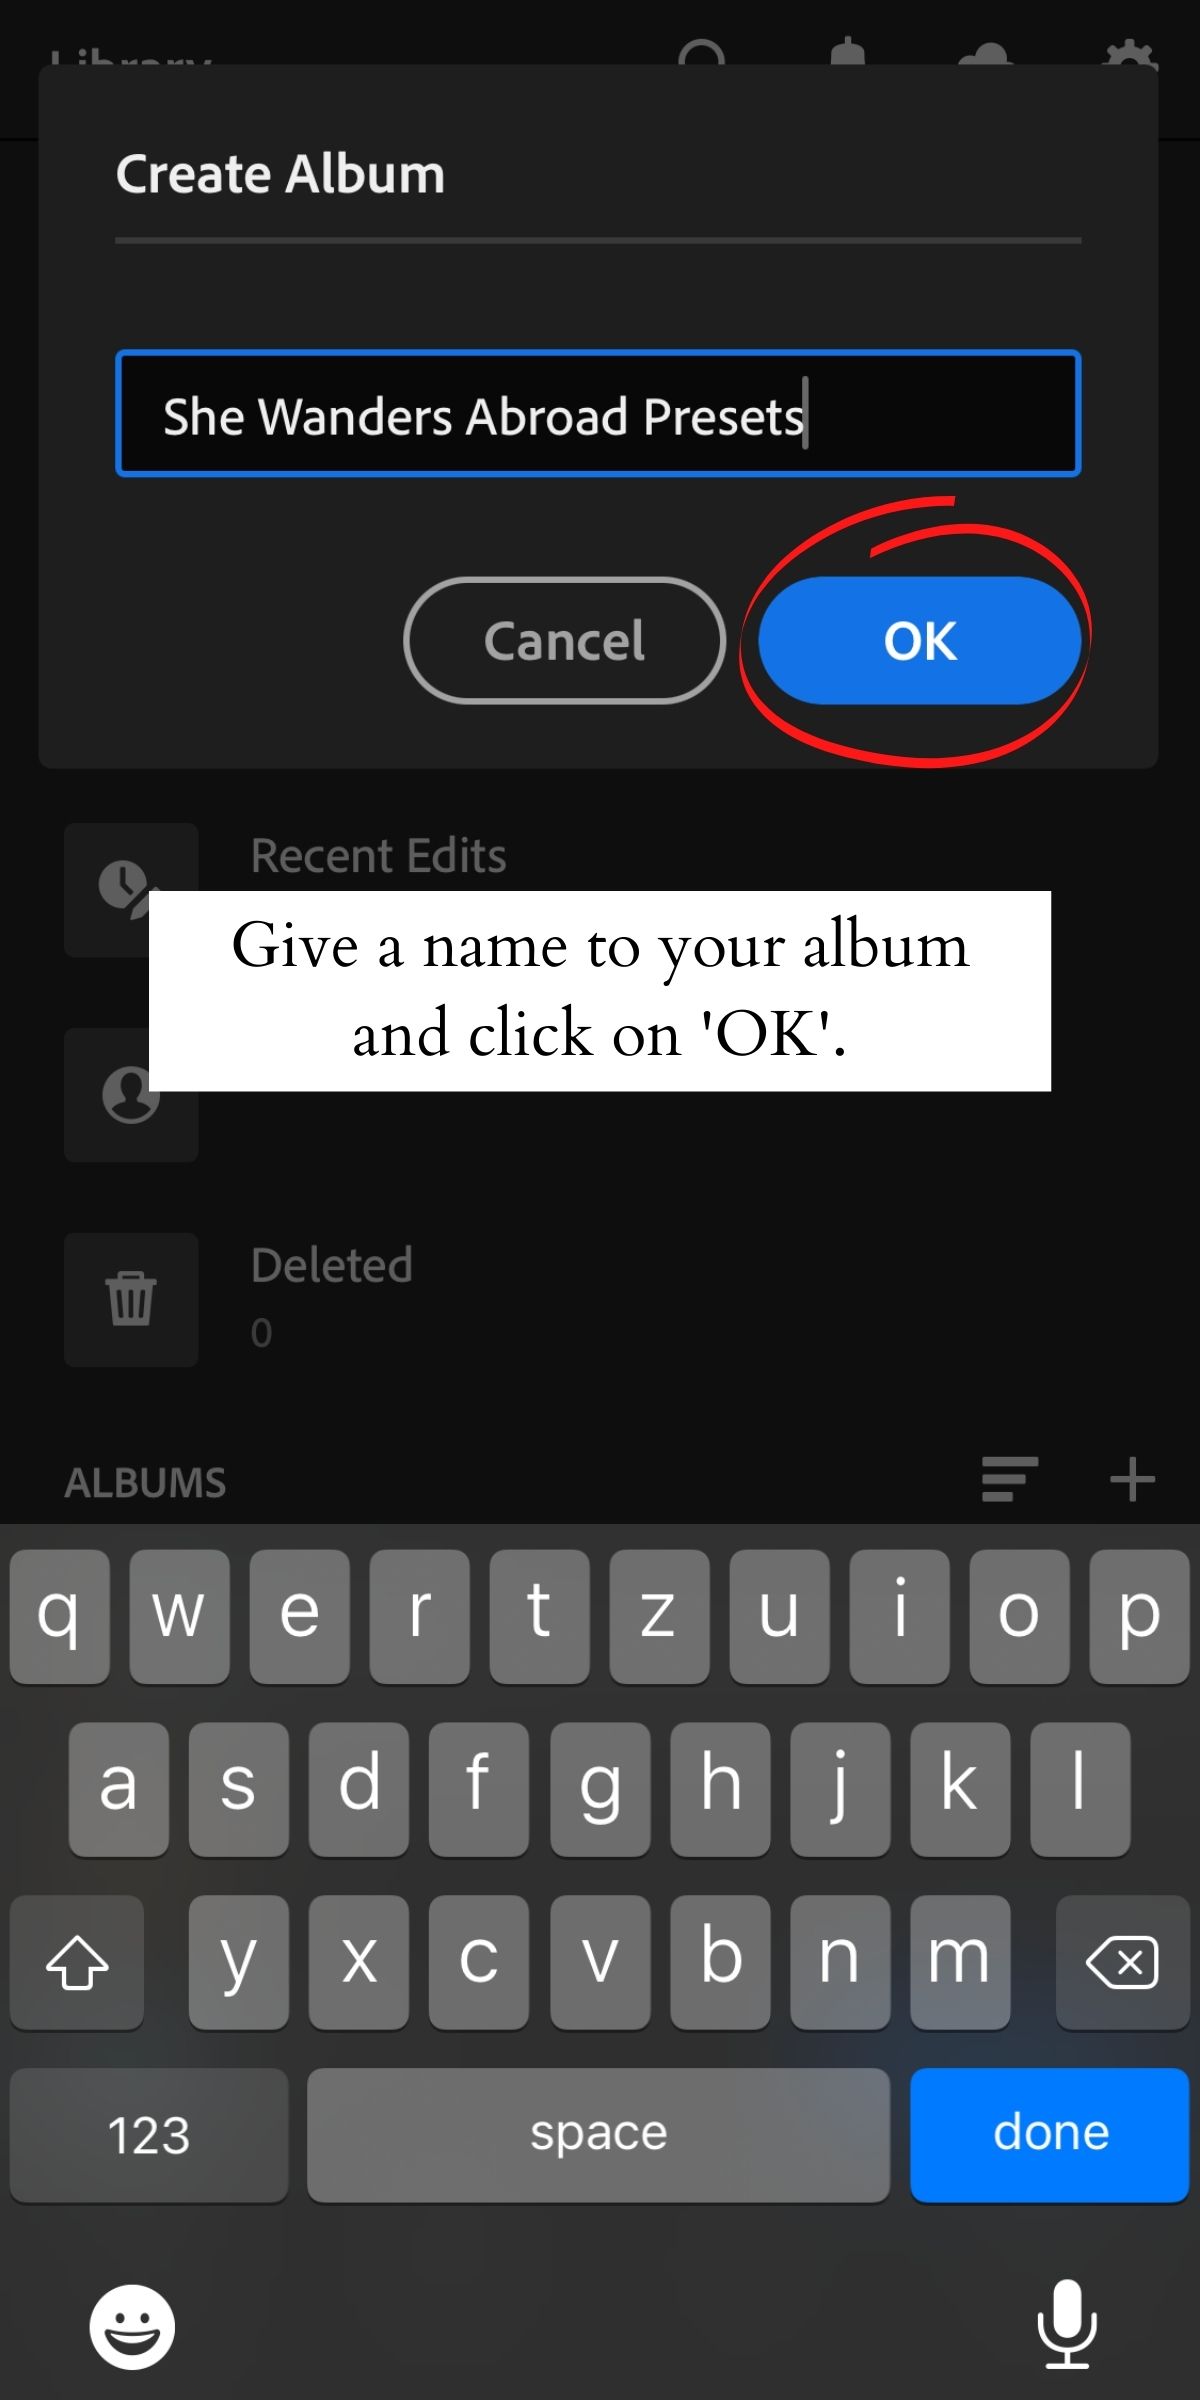
After downloading the DNG file to your gallery, it’s time to import the file into Lightroom. First of all, open the Lightroom mobile app on your phone and create a new album. Just click on the ‘+’ icon next to Albums, click on ‘Album’, name your album, and then hit ‘OK’.
This step is not necessary as you can just import the preset files in any existing album as well but for organization purposes, it’s better to store the presets in a separate album (especially if you import many presets at once).
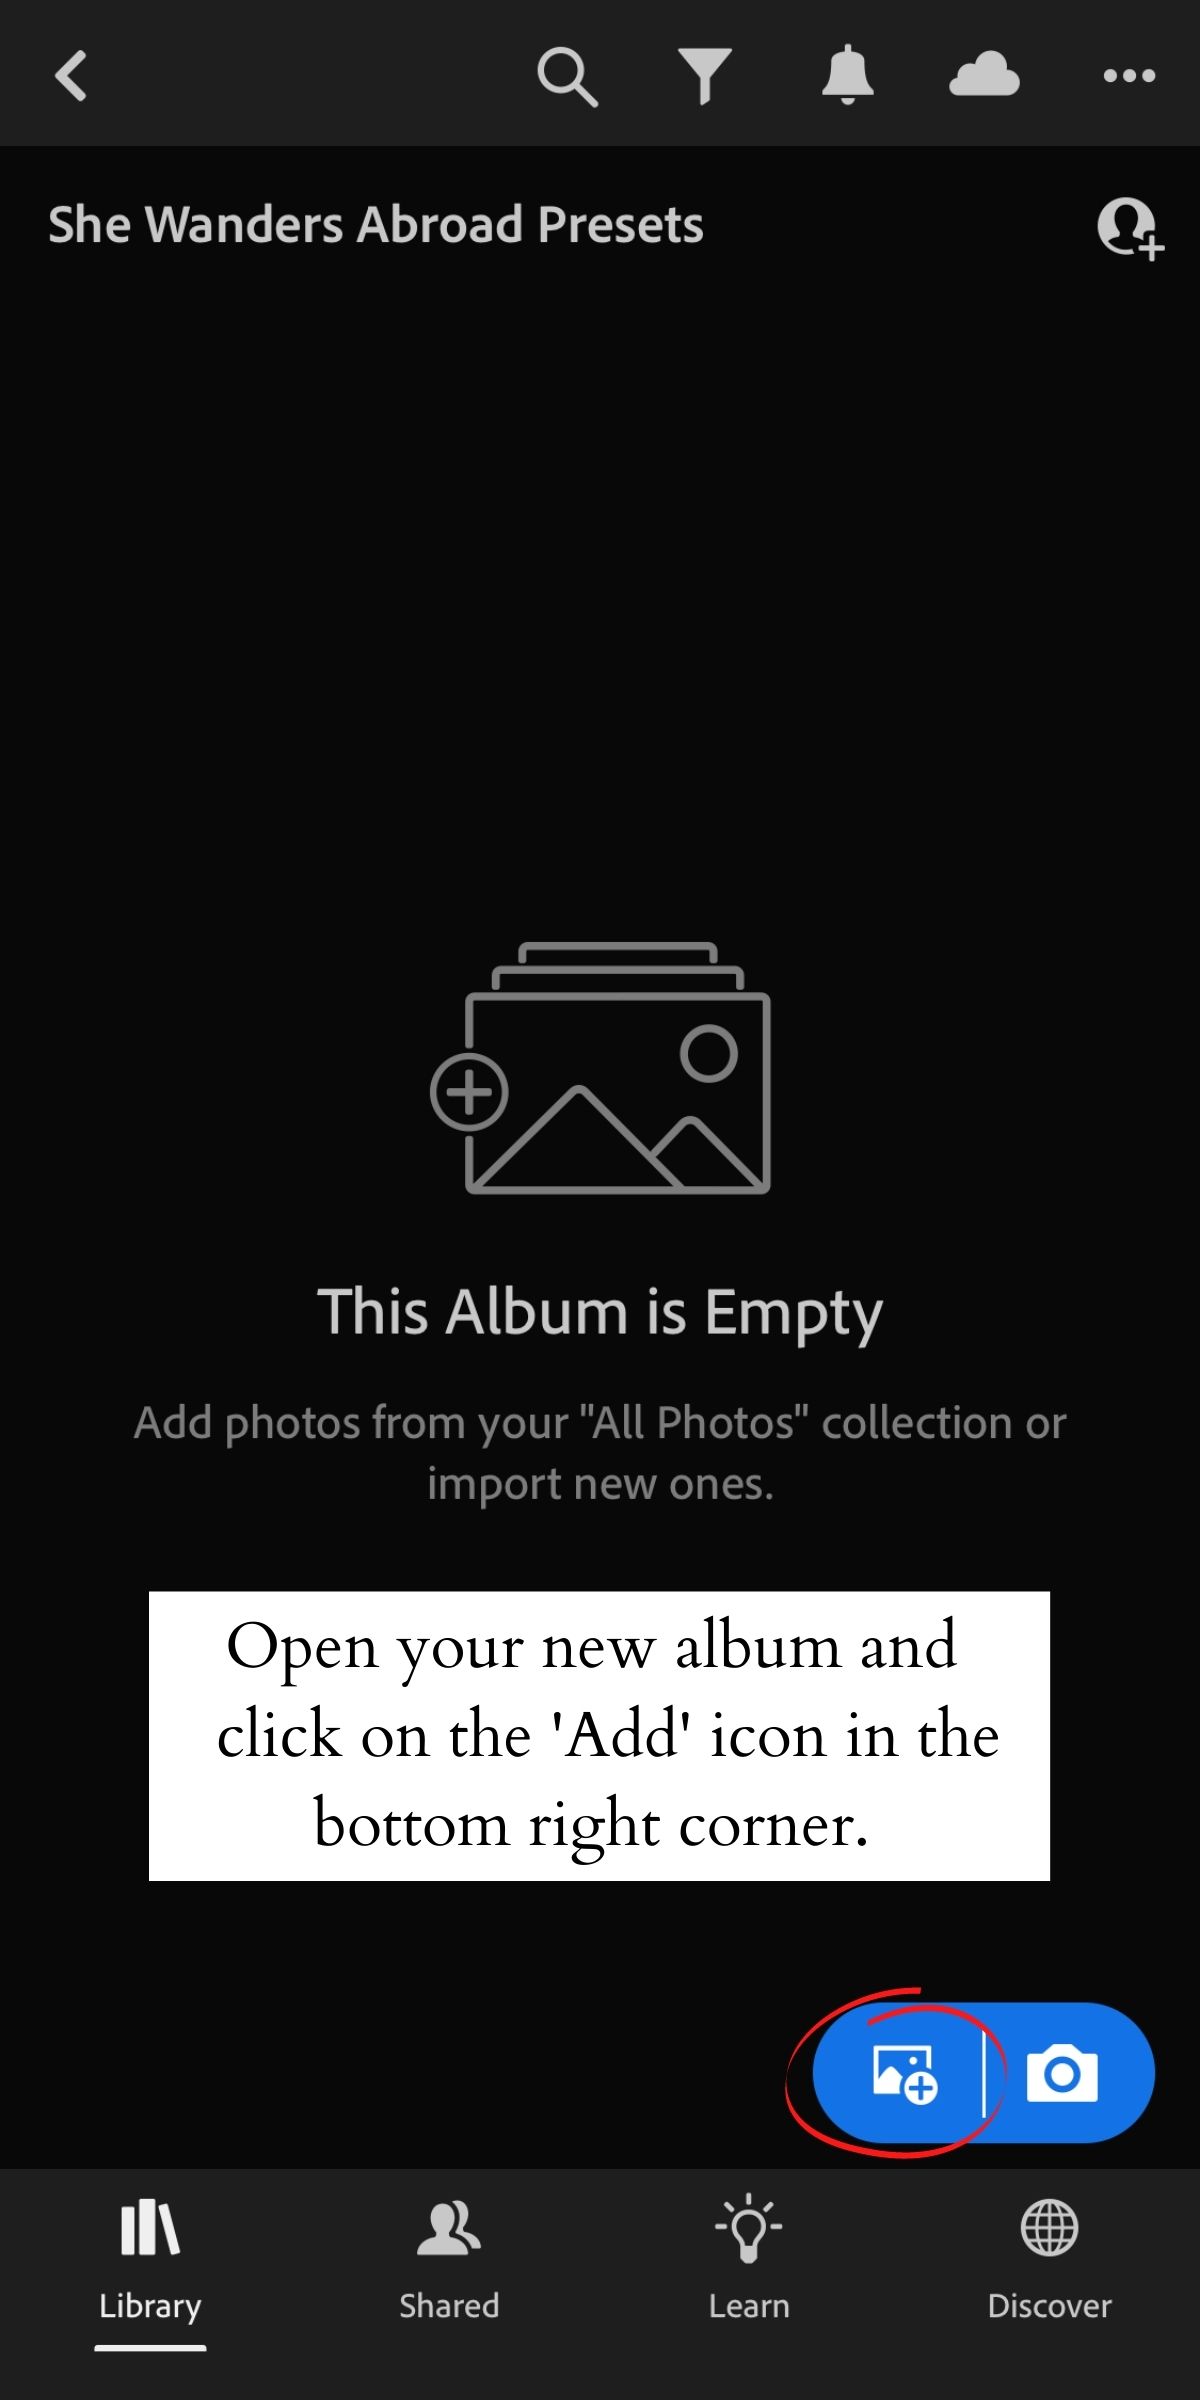
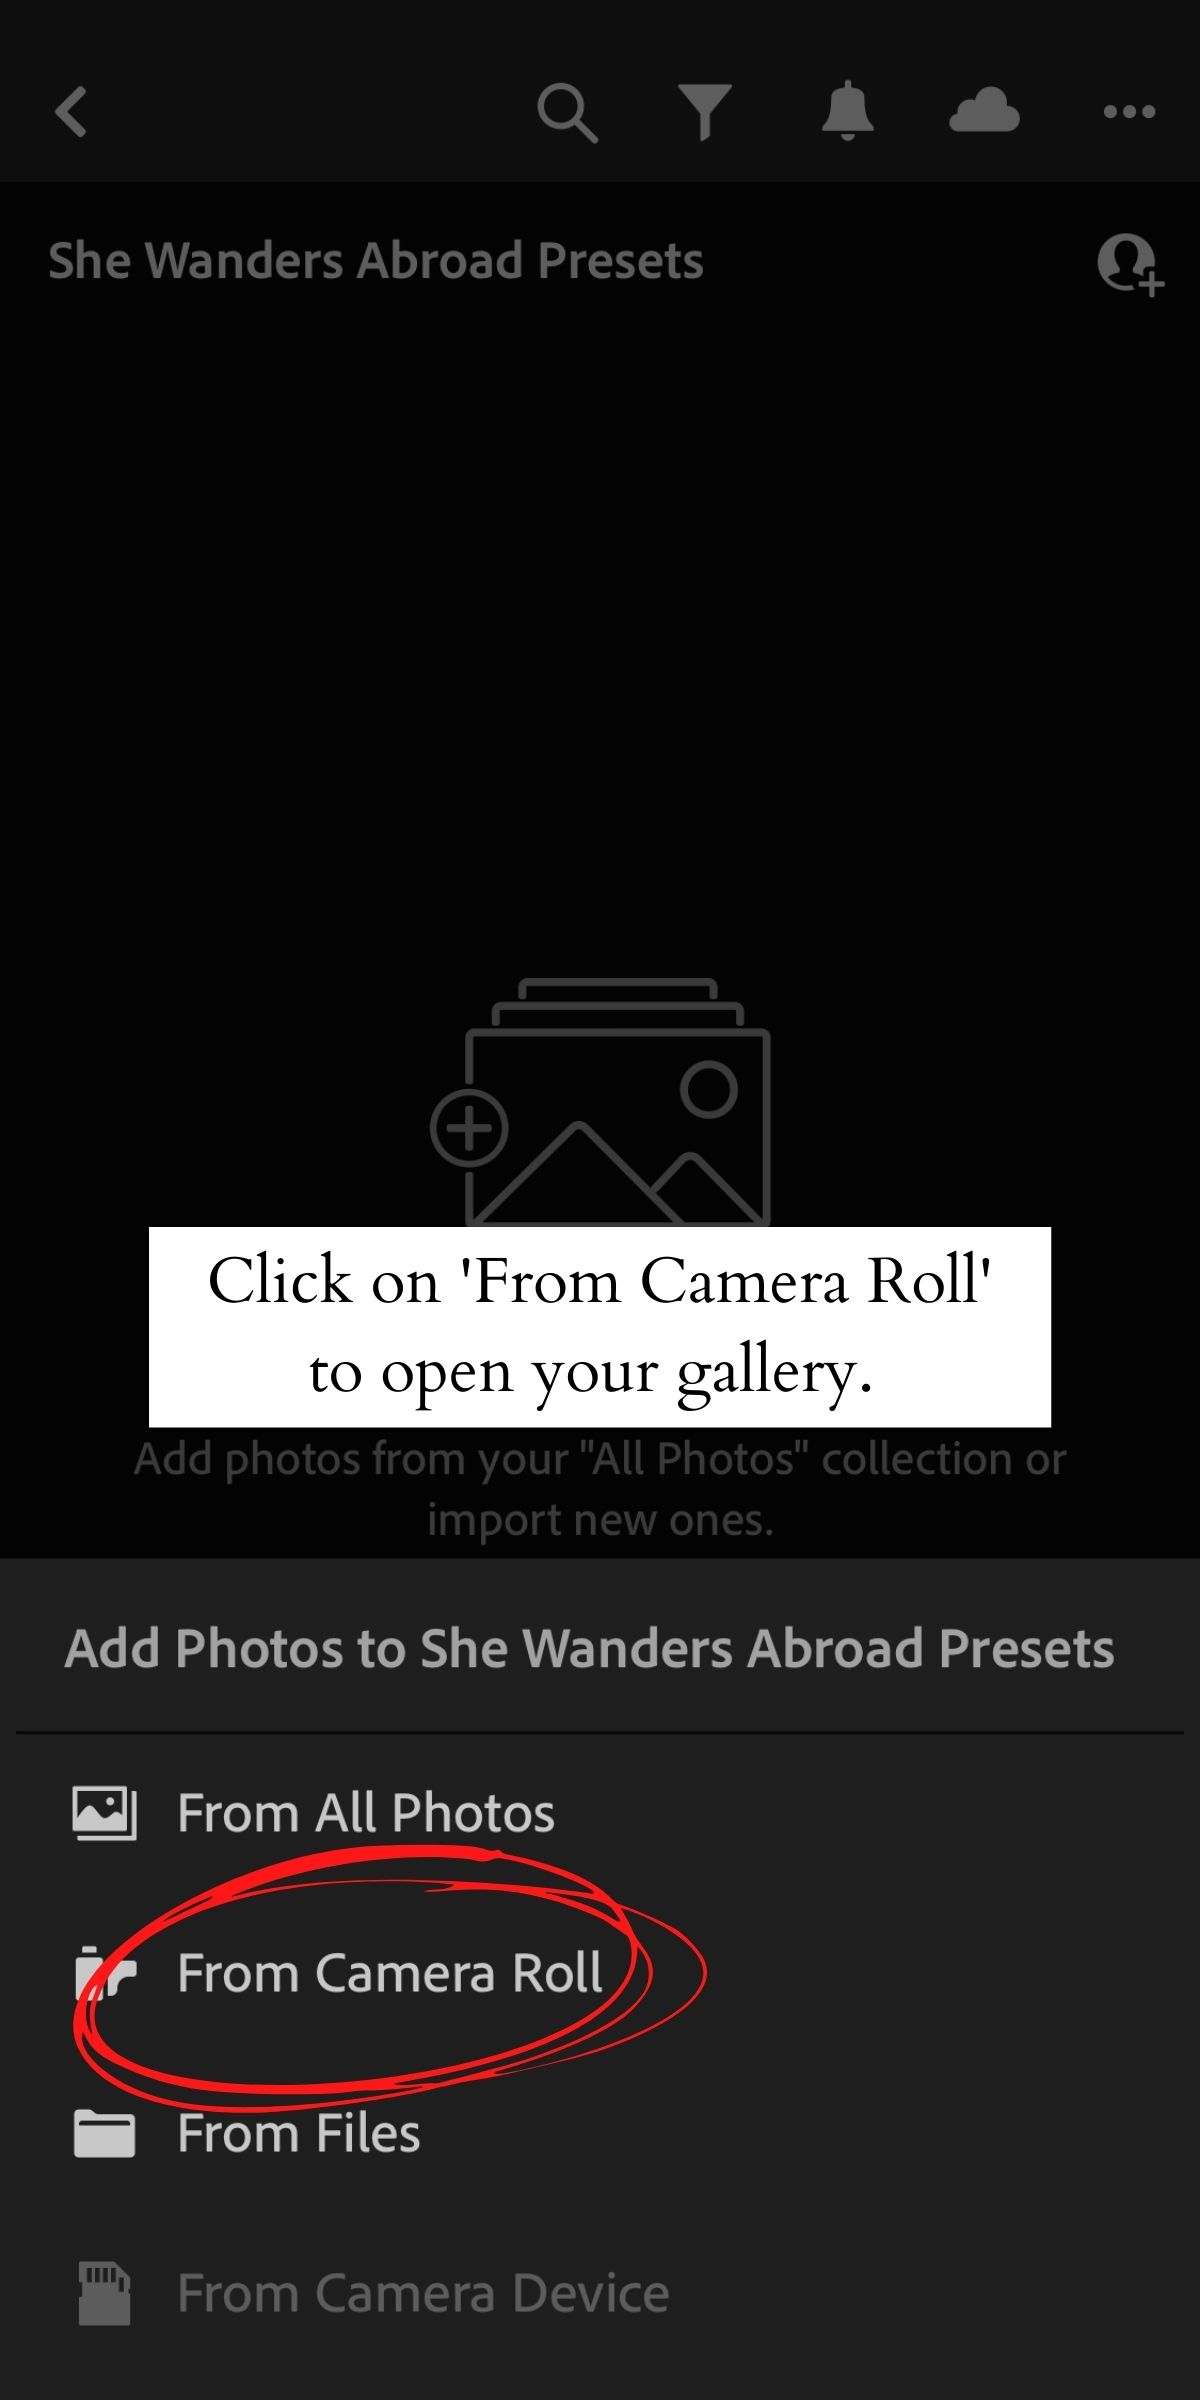
After you created a new album, open it and click on the ‘Add’ icon in the bottom right corner. Click on ‘From Camera Roll’ and select the DNG files you want to import by clicking on the files.
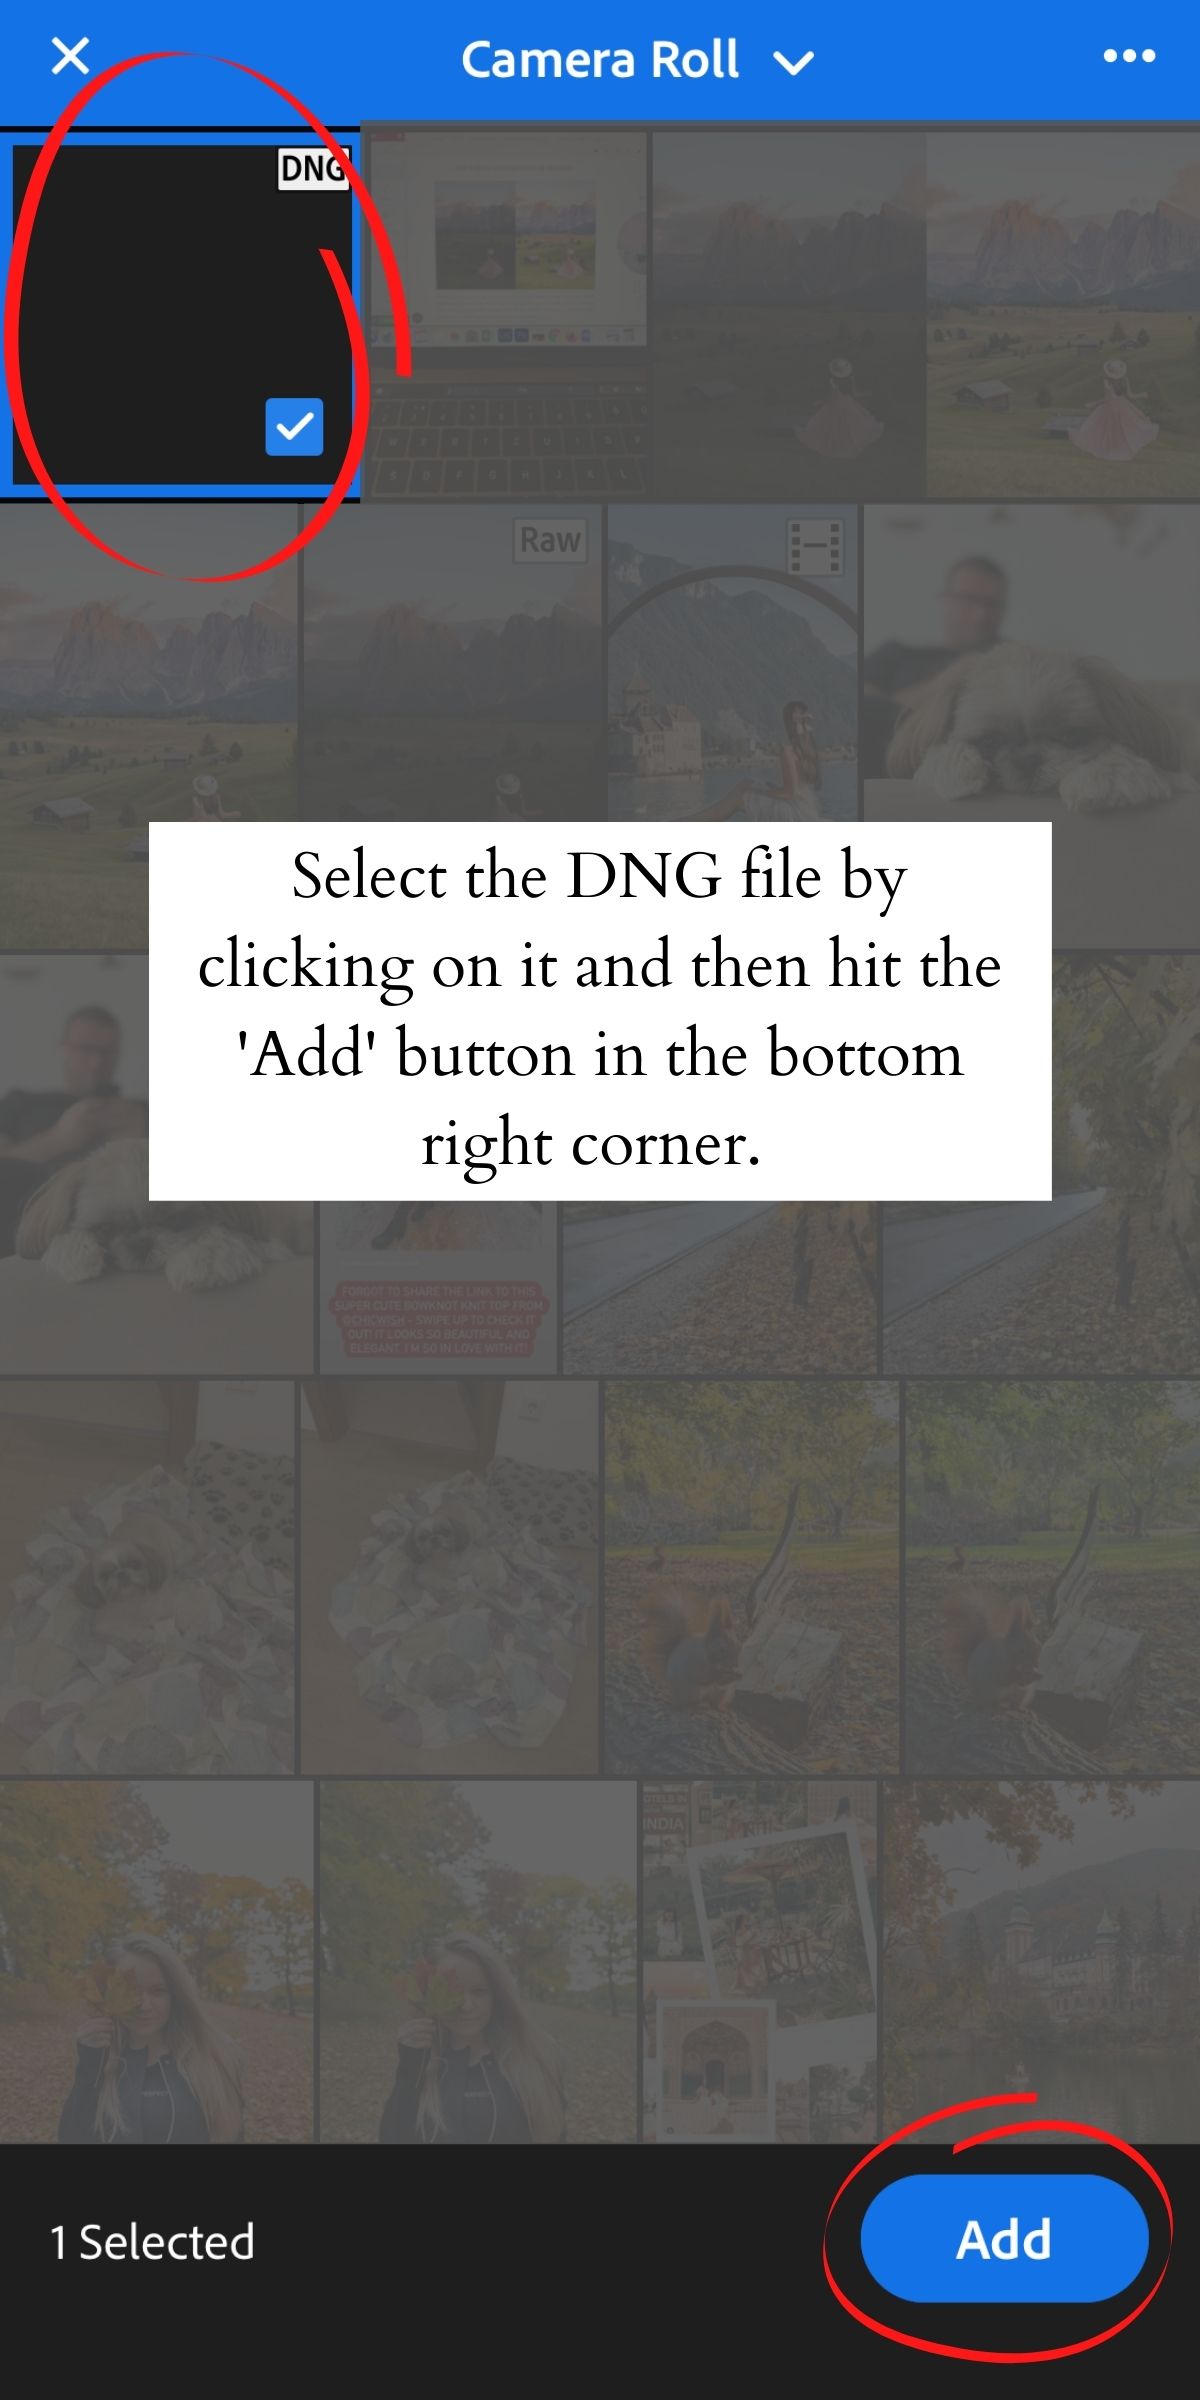
You will only see a blank photo instead of the preview of the preset file but don’t worry, this is how it should be! If you have more preset files to import, you can select all of them at once and then hit ‘Add’ in the bottom right corner.
Step 3: Extract and save the preset from the DNG file
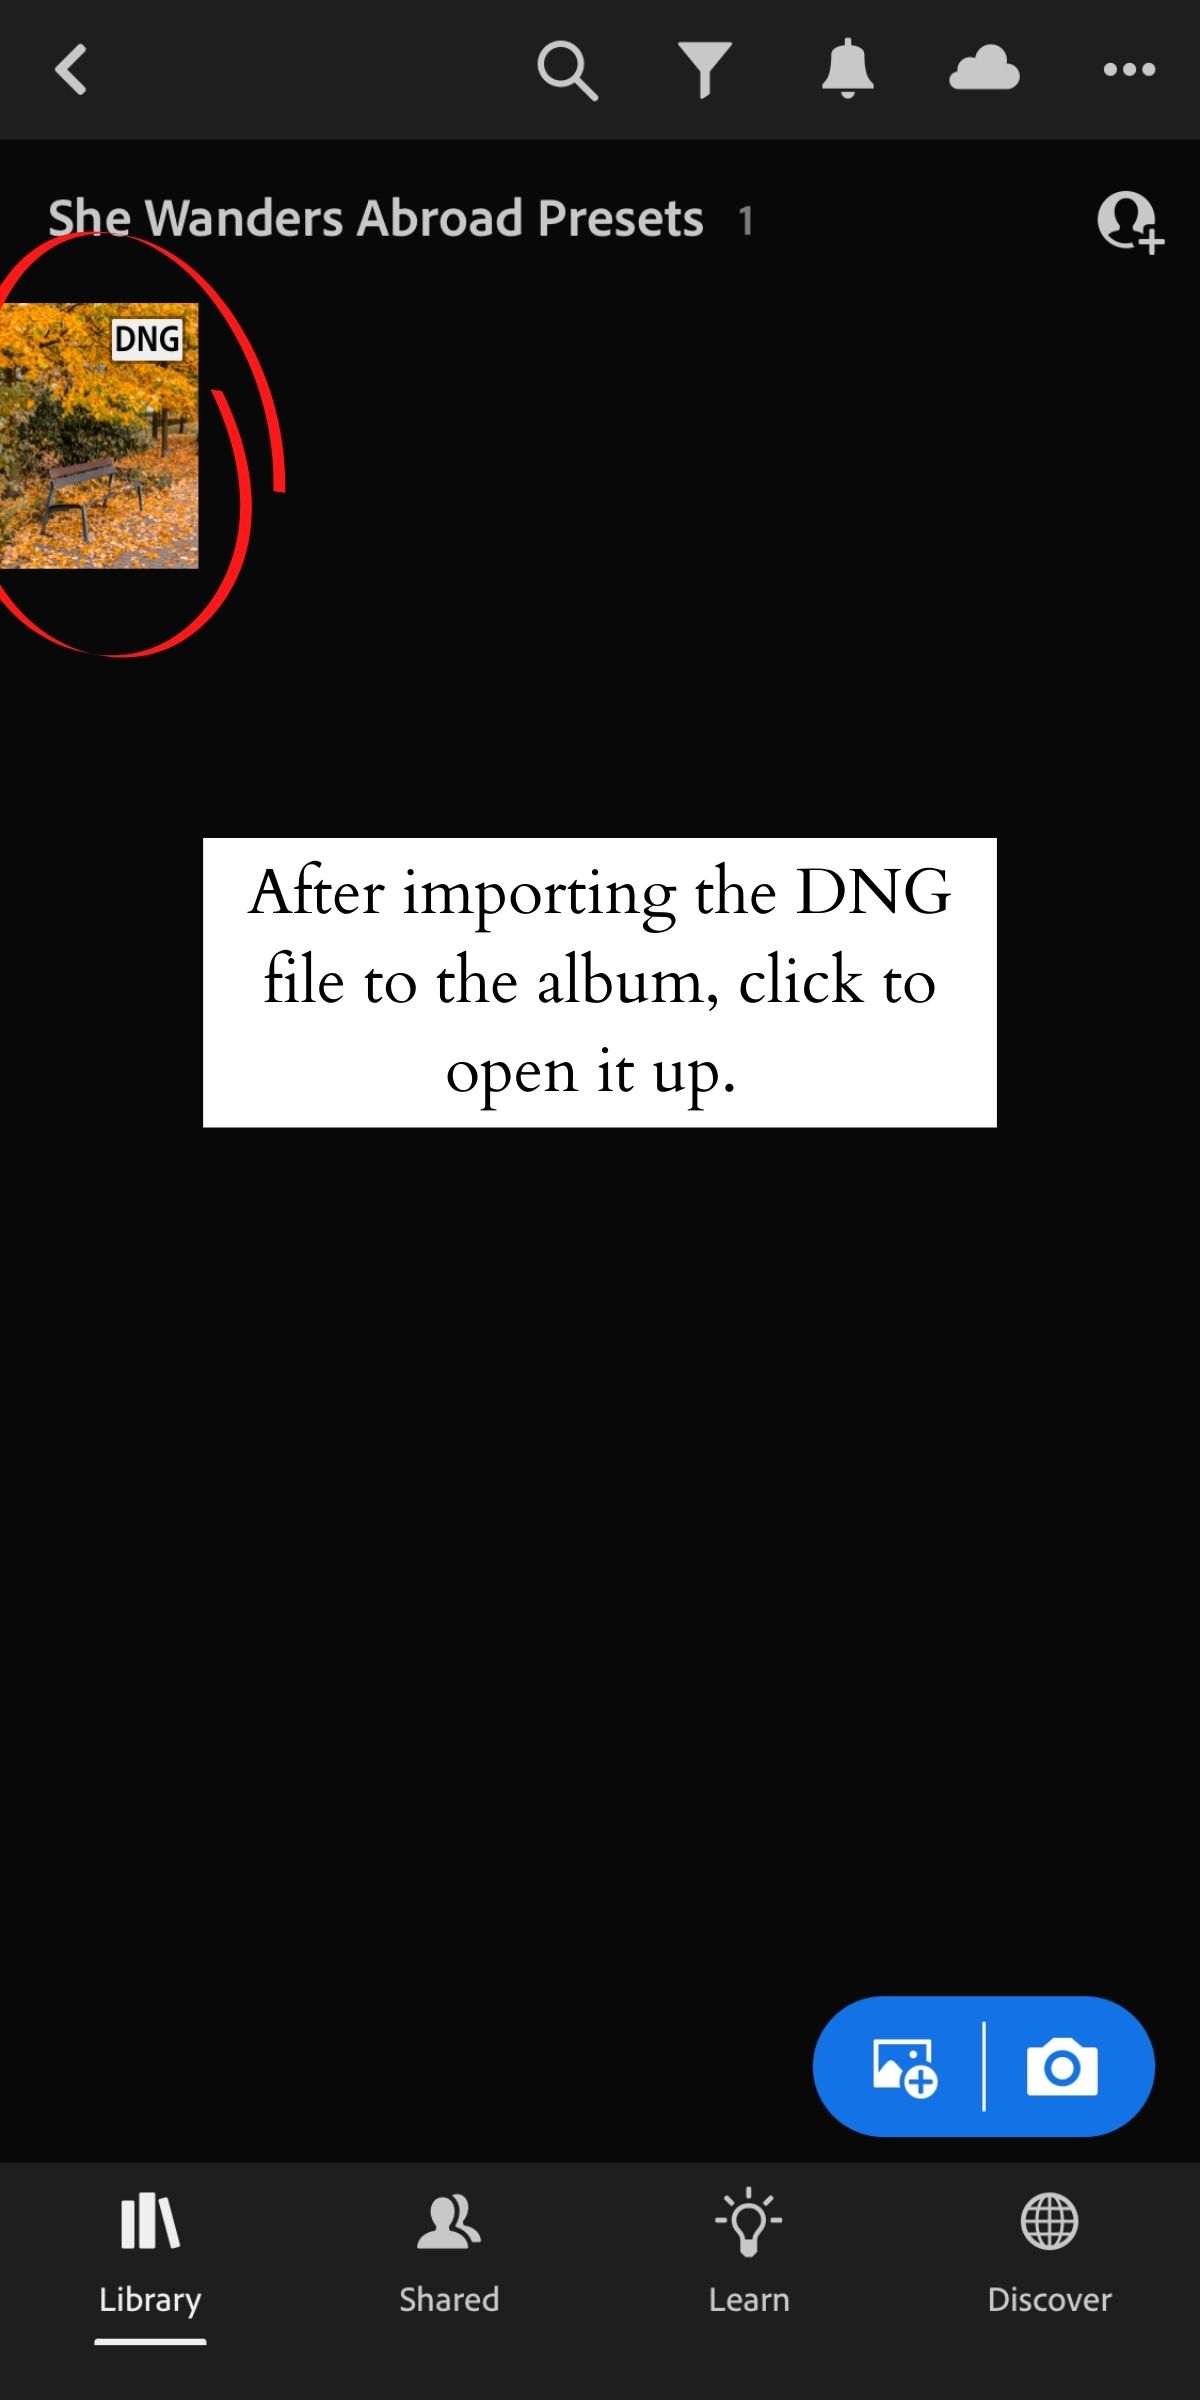
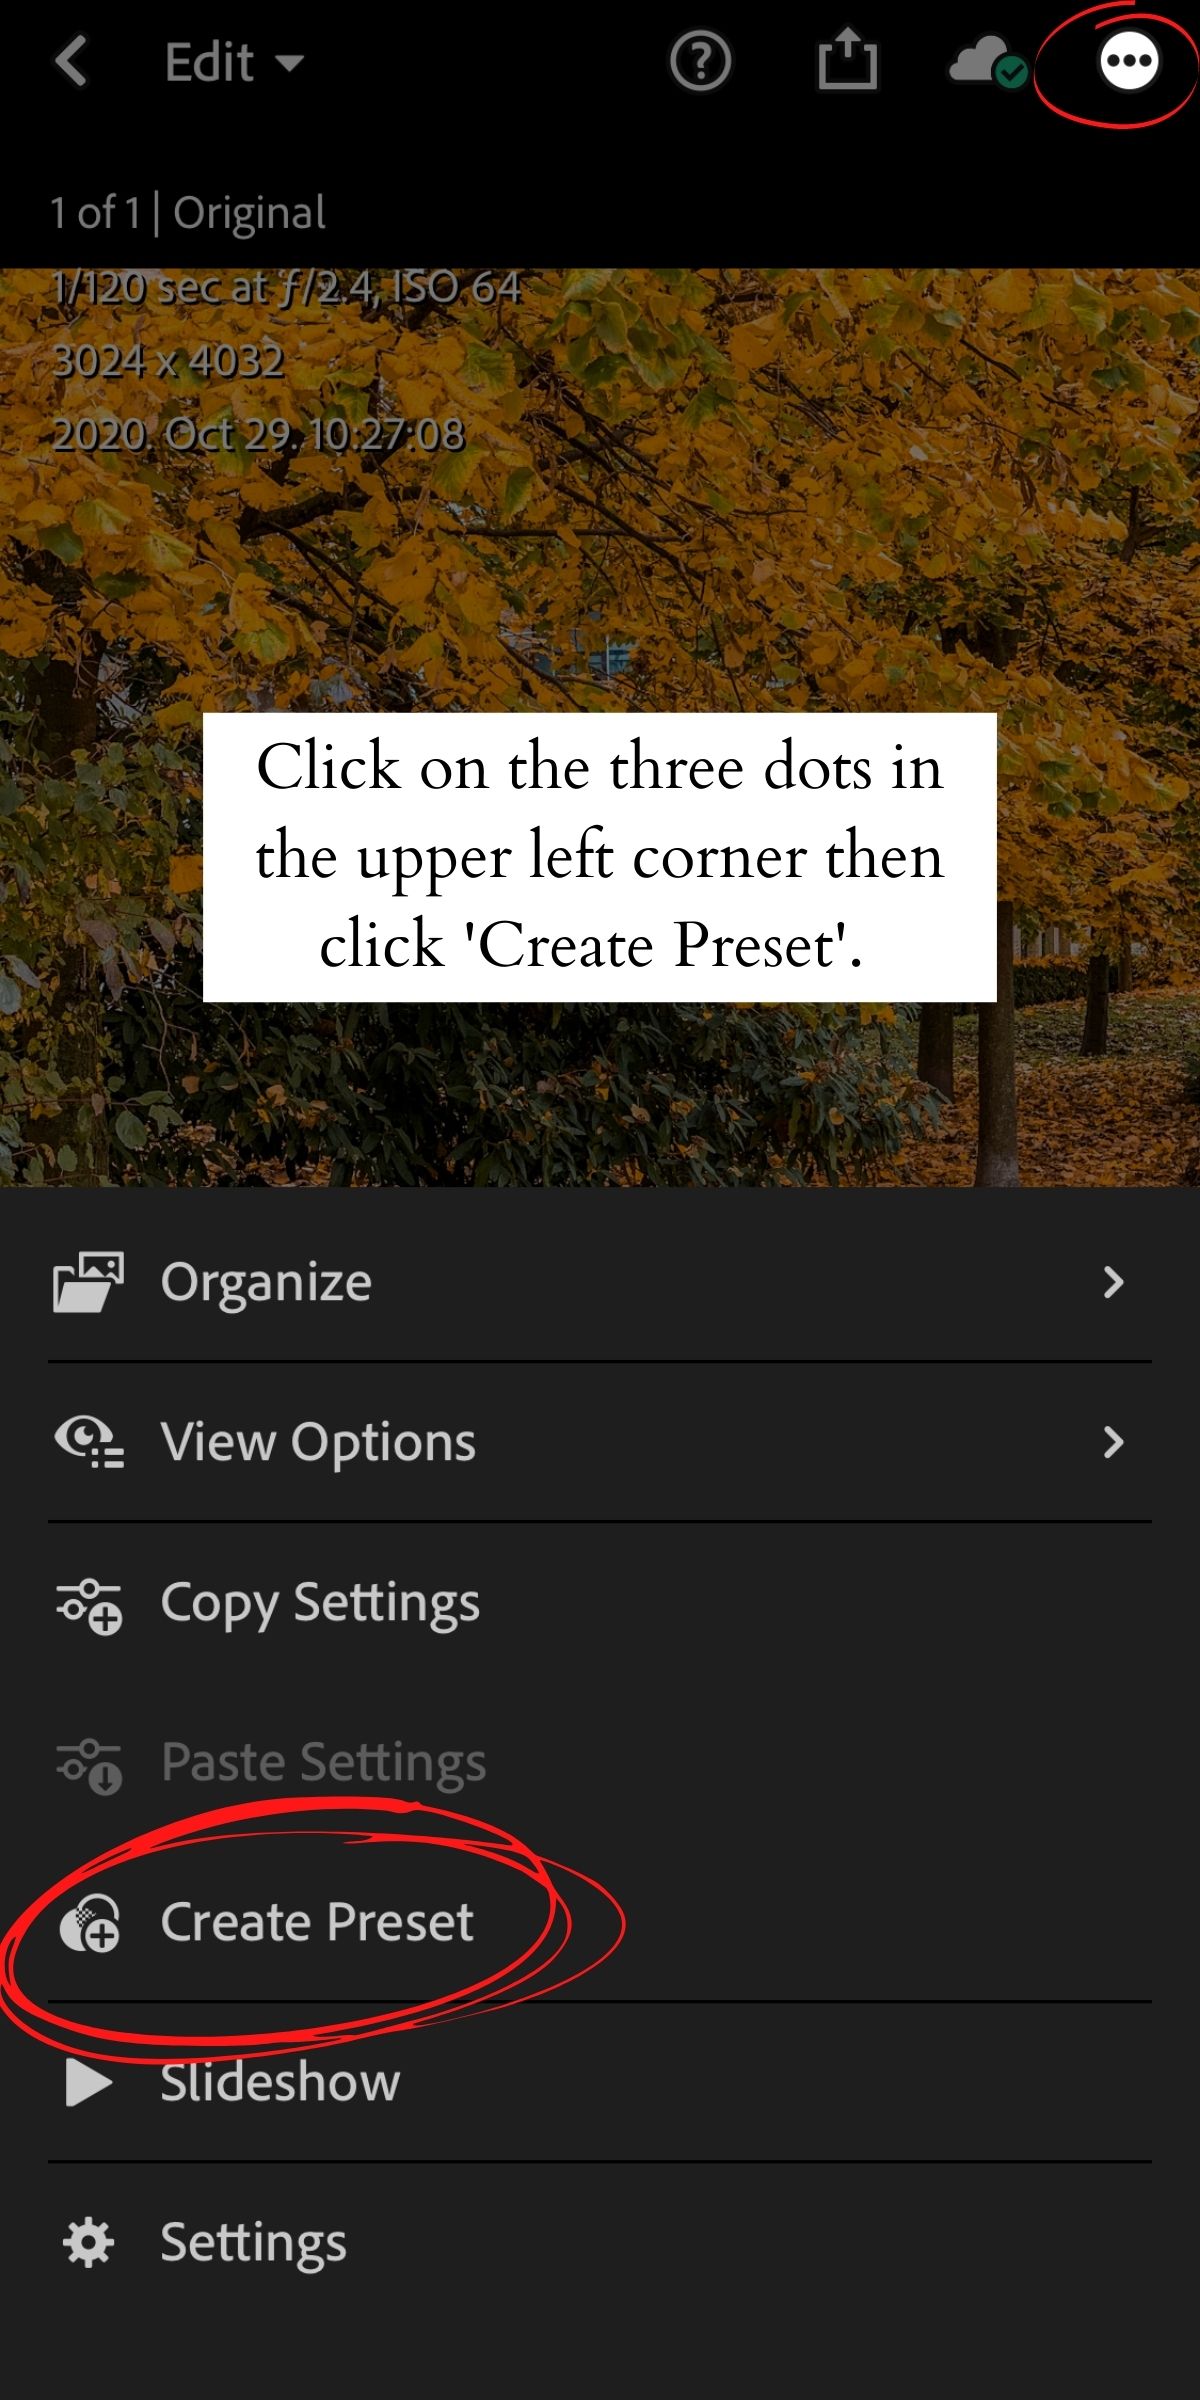
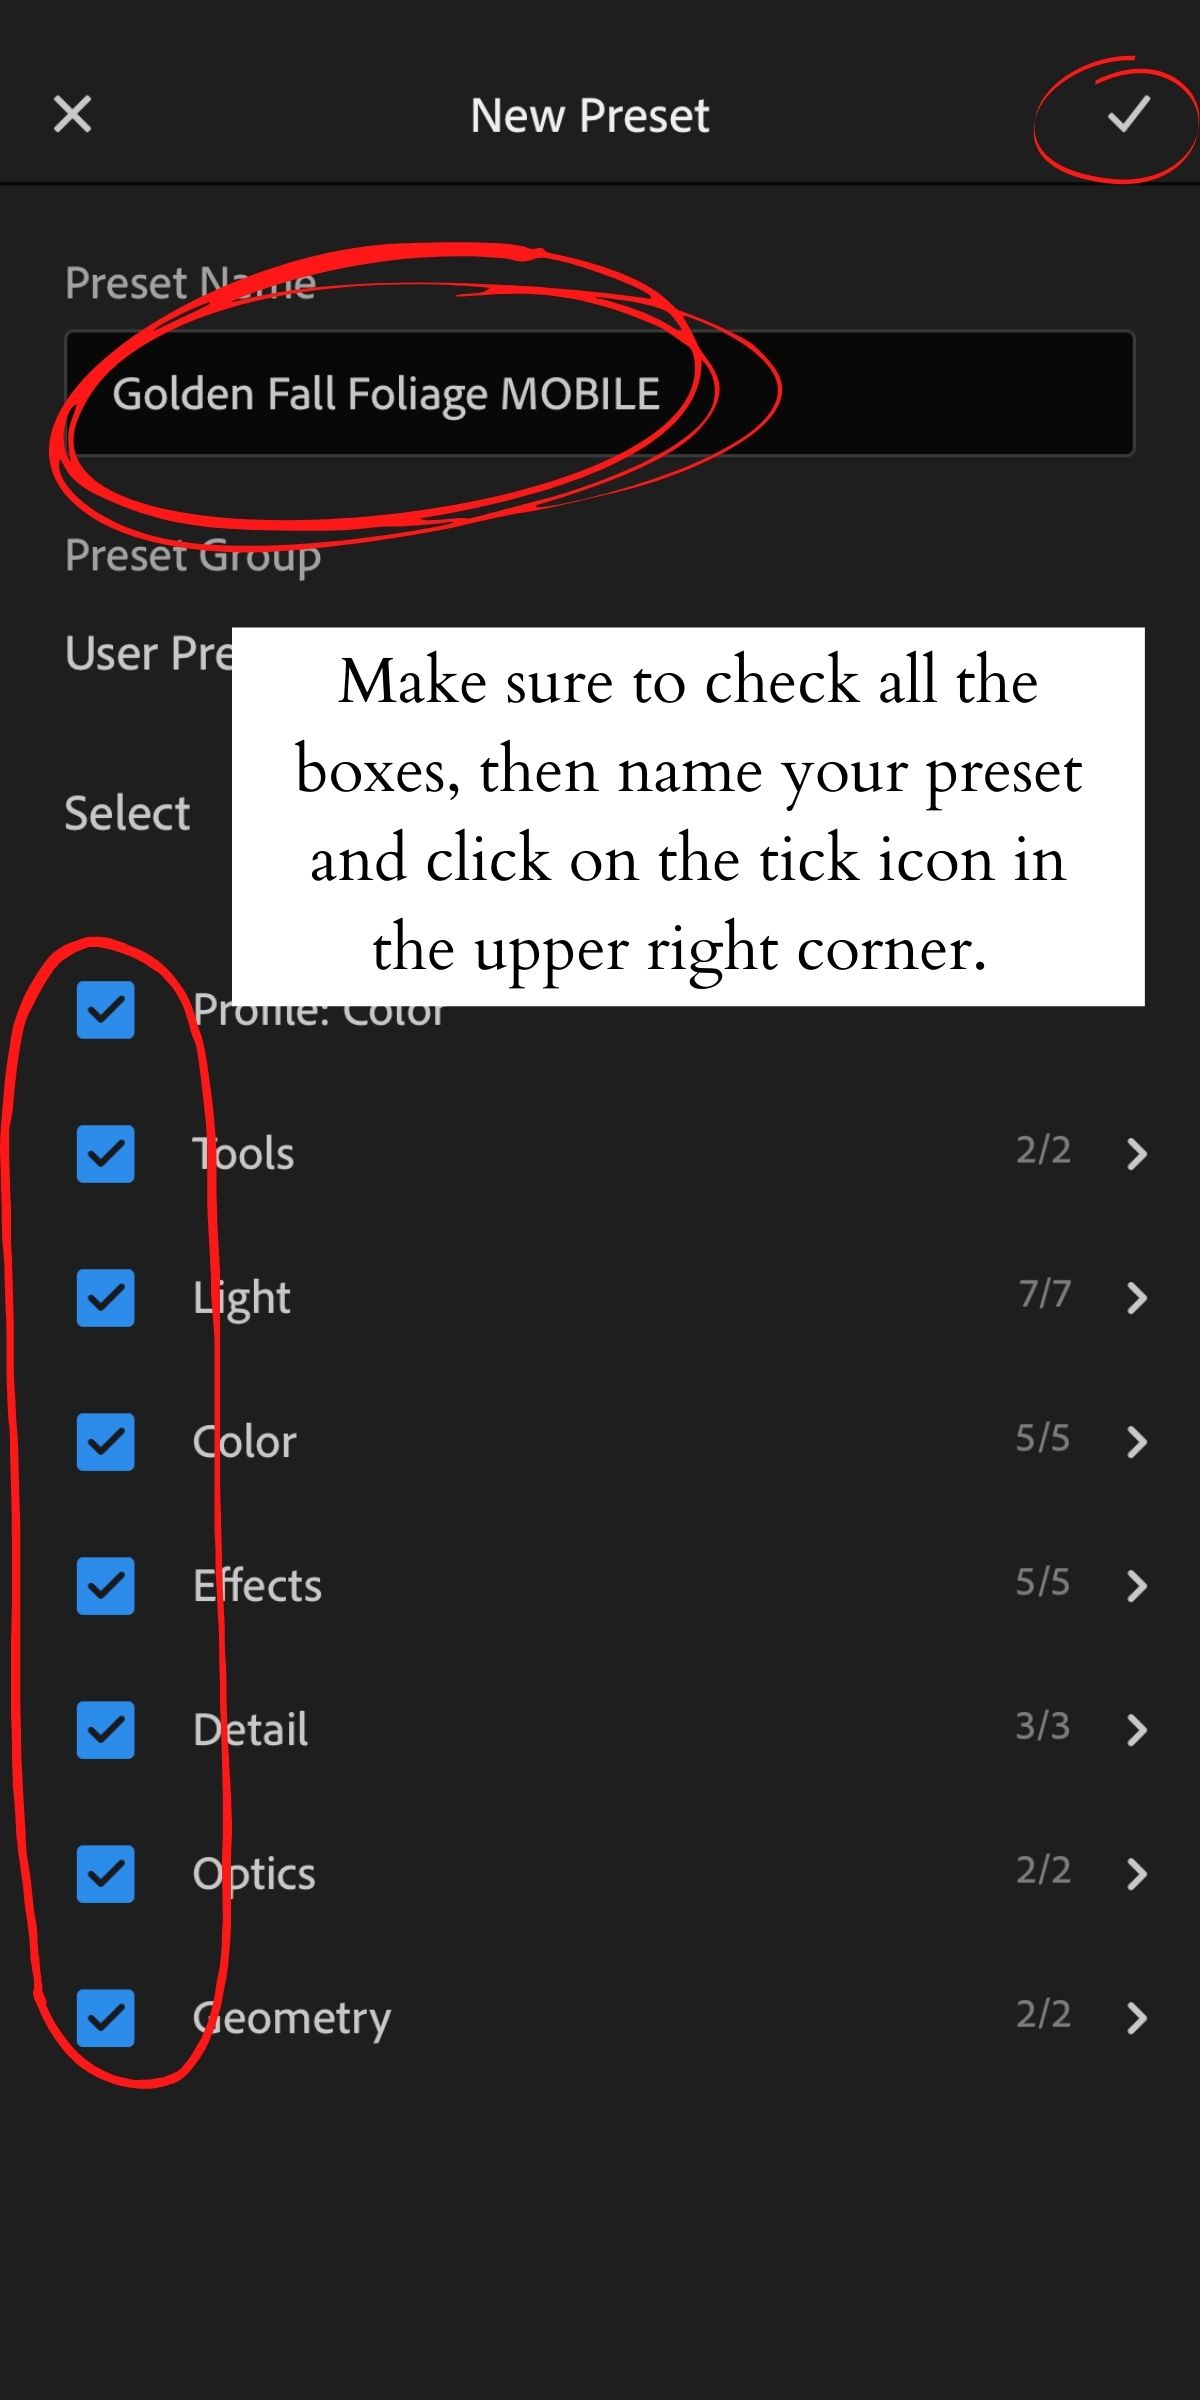
After you imported the preset file, you will finally see the preview. Open the photo, click on the three little dots in the upper right corner and click ‘Create Preset’. Make sure to check all the boxes to save all the settings from the preset, then name your preset and click on the tick icon in the upper right corner.
Congrats, you just saved your first preset and it’s ready to use!
If you have more preset files, you will need to repeat the exact same process on all of the photos. You can name each preset however you want but for organizational purposes, I recommend using the original name of the DNG file.
Step 4: Start editing
Now that your preset is ready to use, you can finally start editing your photos! First of all, choose all the photos you want to edit and import them the same way you imported the preset file. You can create different albums for different types of photos or you can just import everything to one album, it’s totally up to you.
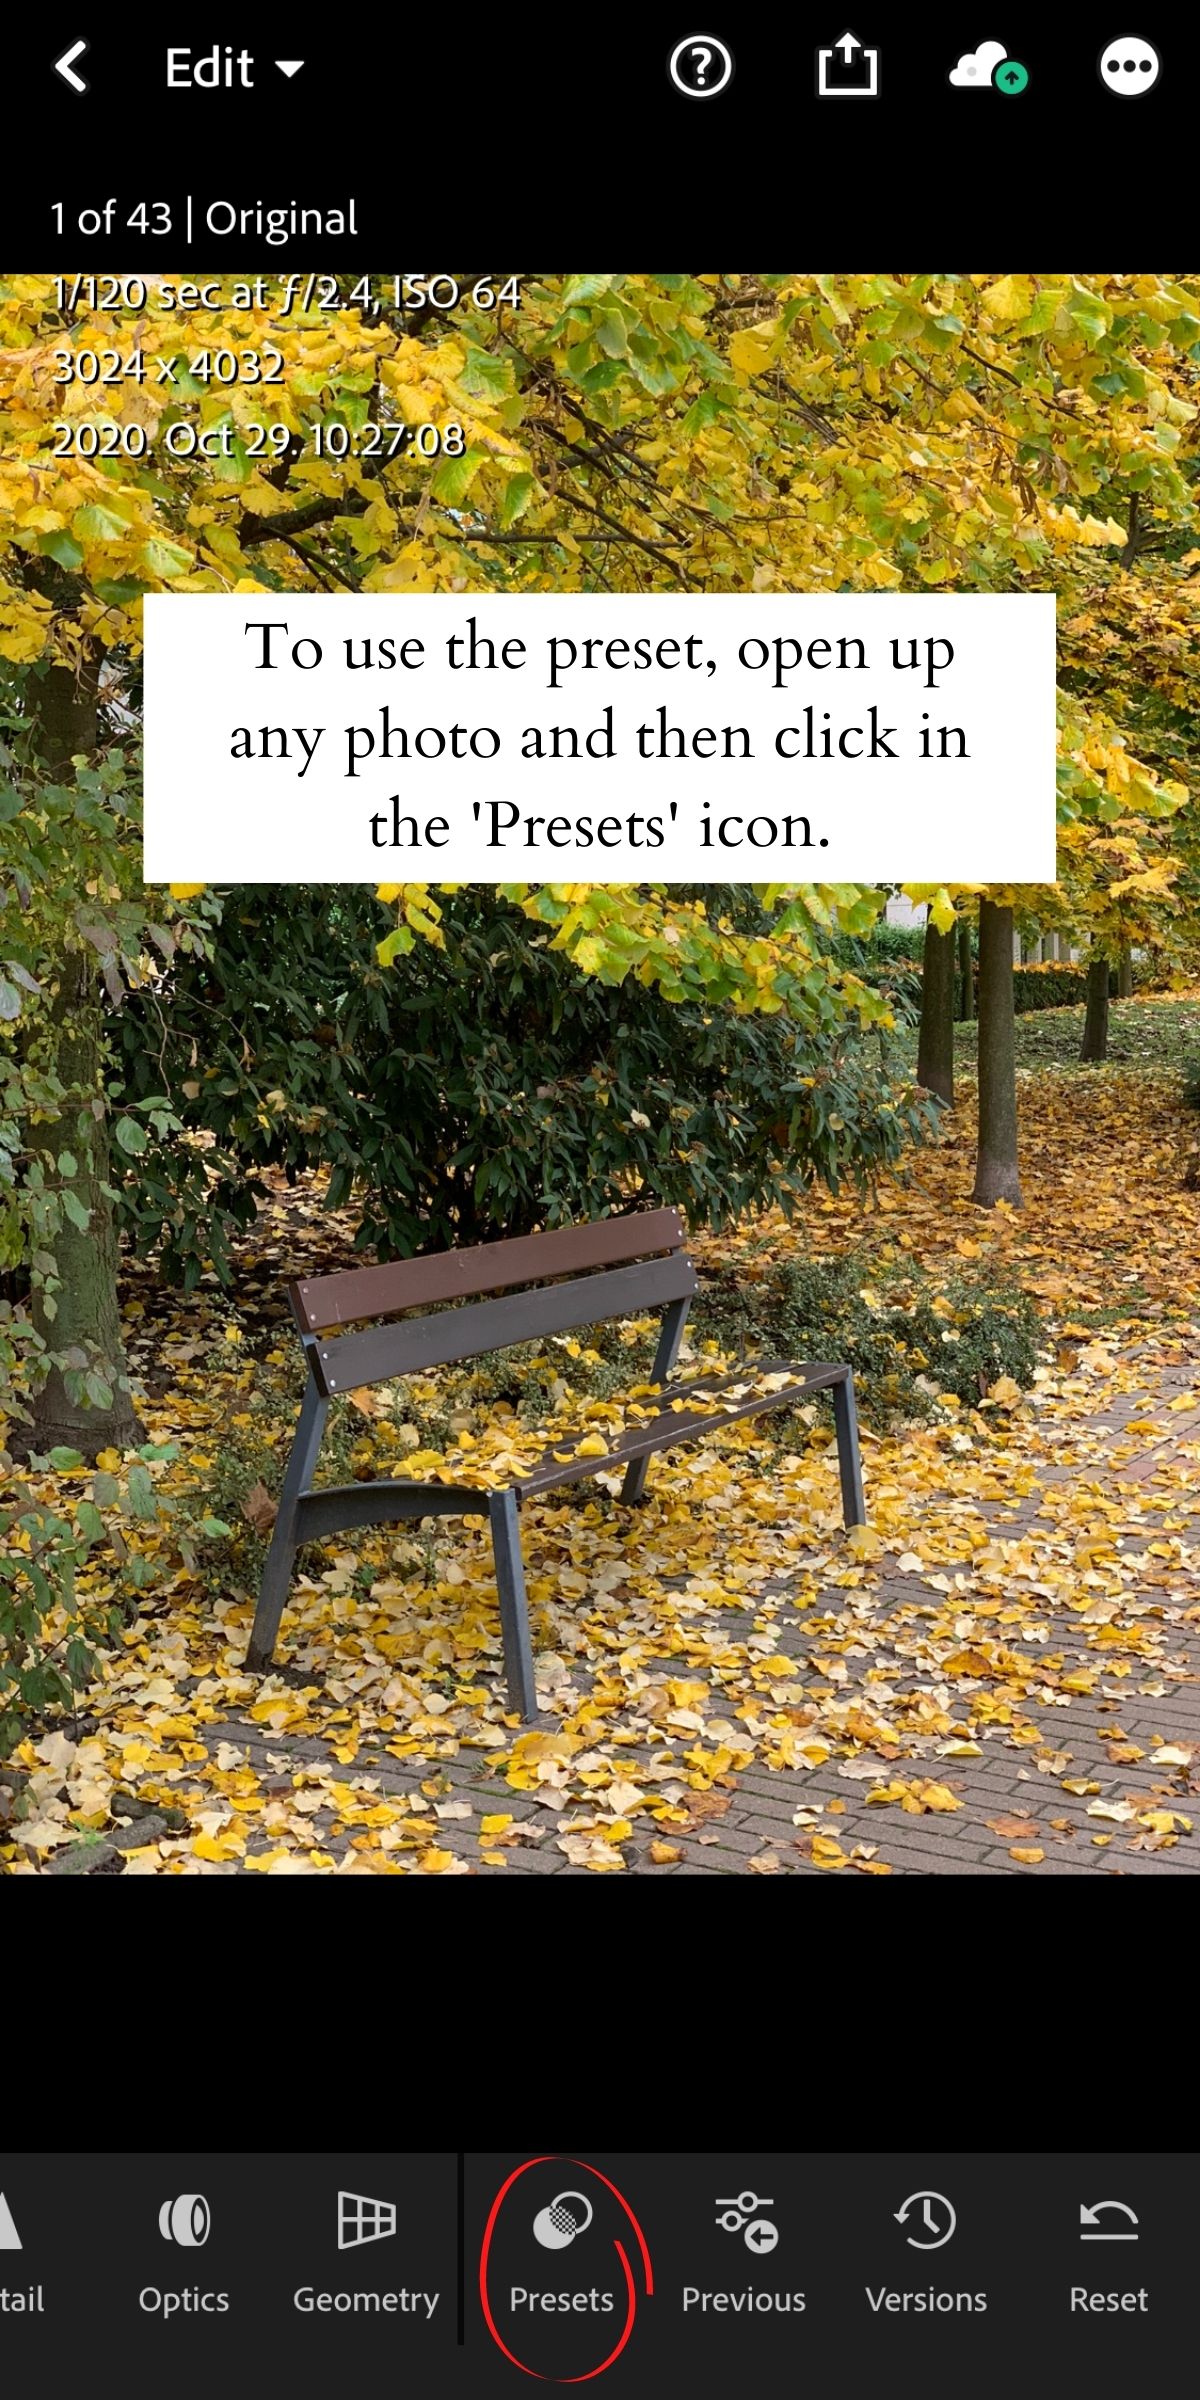
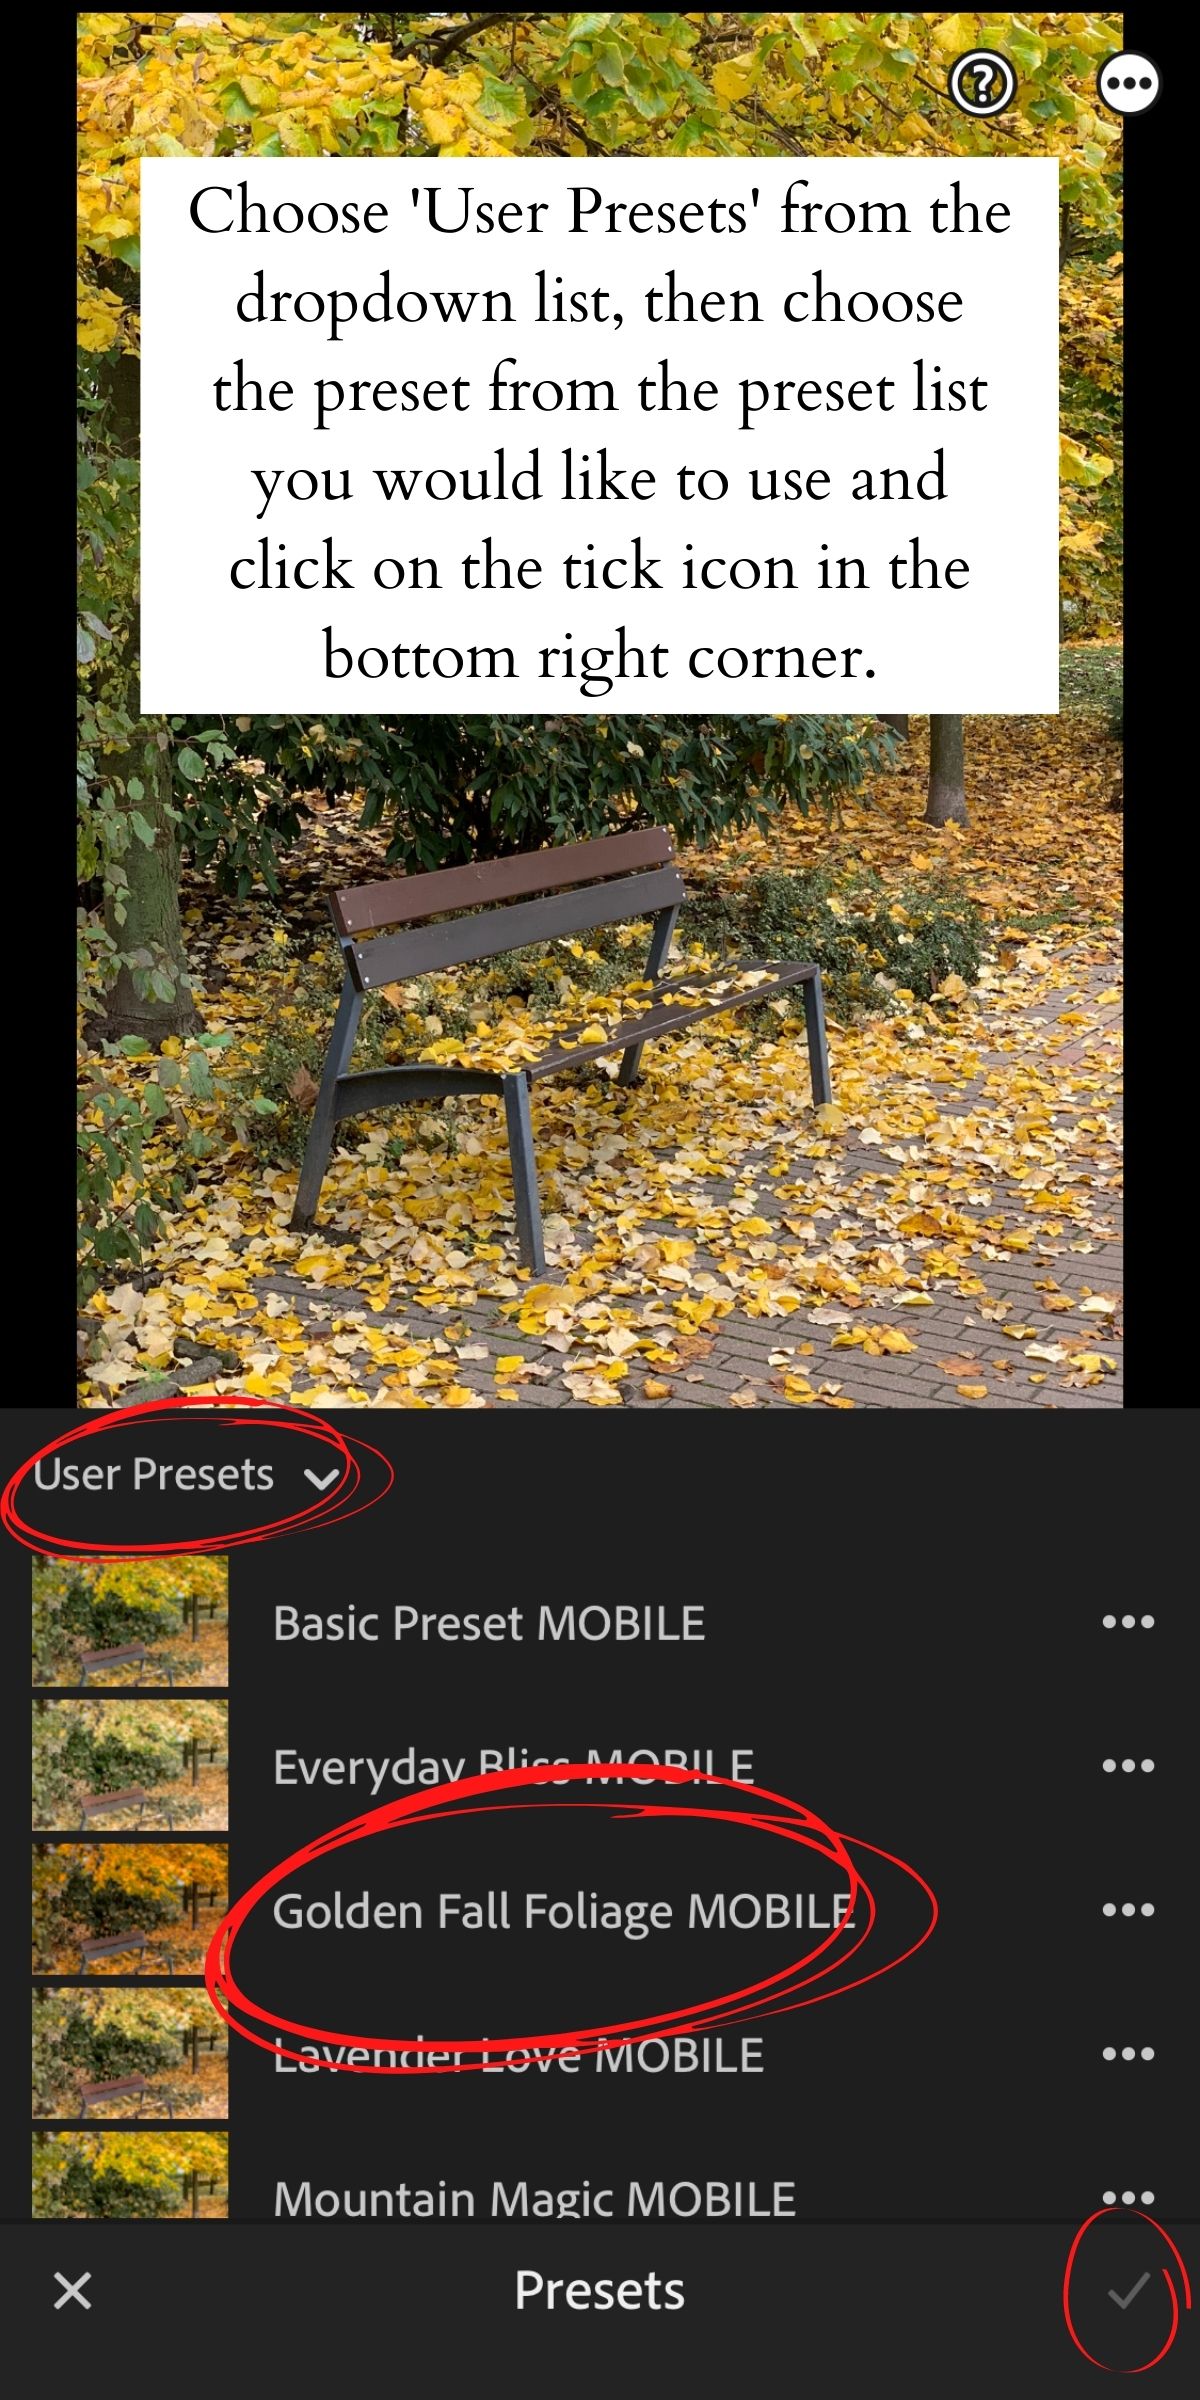
After you imported your photos to Lightroom, you need to find the ‘Presets’ icon in the toolbar (you need to scroll almost all the way to the end). Click on the ‘Presets’ icon and choose ‘User Presets’ from the dropdown list.
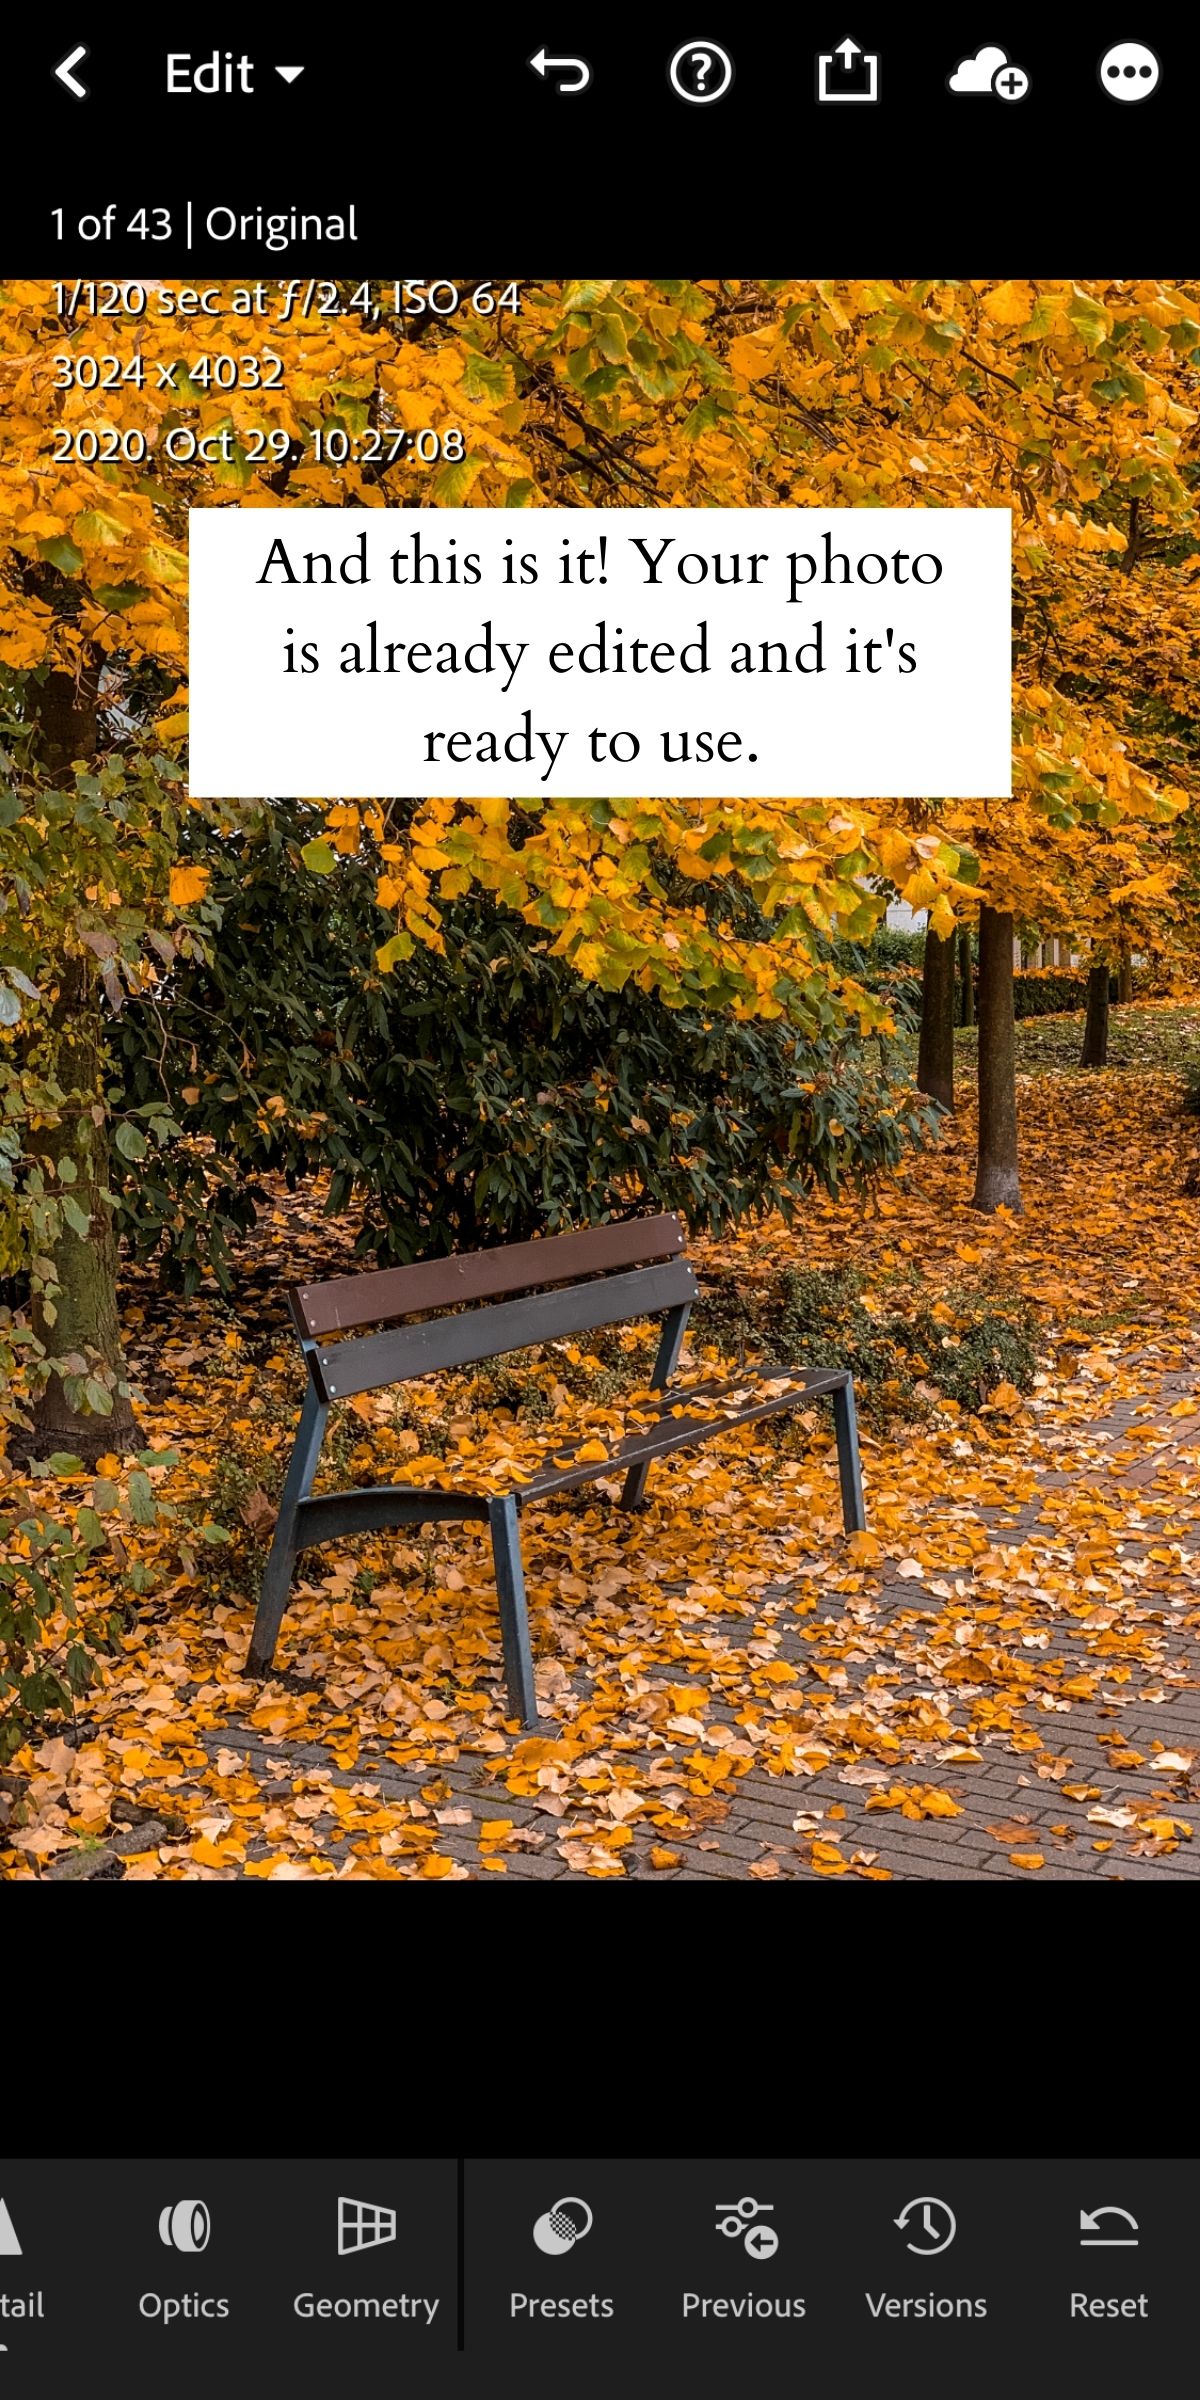
Choose the preset from the list you would like to use and click on the tick icon in the bottom right corner. And this is it! Congrats, you just edited your first photo with presets!
If you like to final result, you can just click on the share button in the upper right corner and export it to your camera roll. Of course, you can make your own adjustments after applying the preset as well, in this case just simply apply the preset and then play around with the different settings before exporting your photo.
Since every photo is unique, there are some cases when the presets don’t look perfect on your photo. Most of the time this can easily be fixed by modifying the exposure and the shadows under the ‘Light’ panel and the temperature in the ‘Color’ panel.
You can also experiment with adjusting the different colors by clicking on ‘Mix’ in the upper right corner under the ‘Color’ panel.
Try My Free Lightroom Preset
Subscribe to my email list to get access to my ‘Golden Fall Foliage MOBILE’ Lightroom preset for free! It will give your fall photos a magical warm and golden look but with some small adjustments, it can also be used for other types of photos as well.
Subscribe to my newsletter to get my FREE preset!
Pin It for Later!